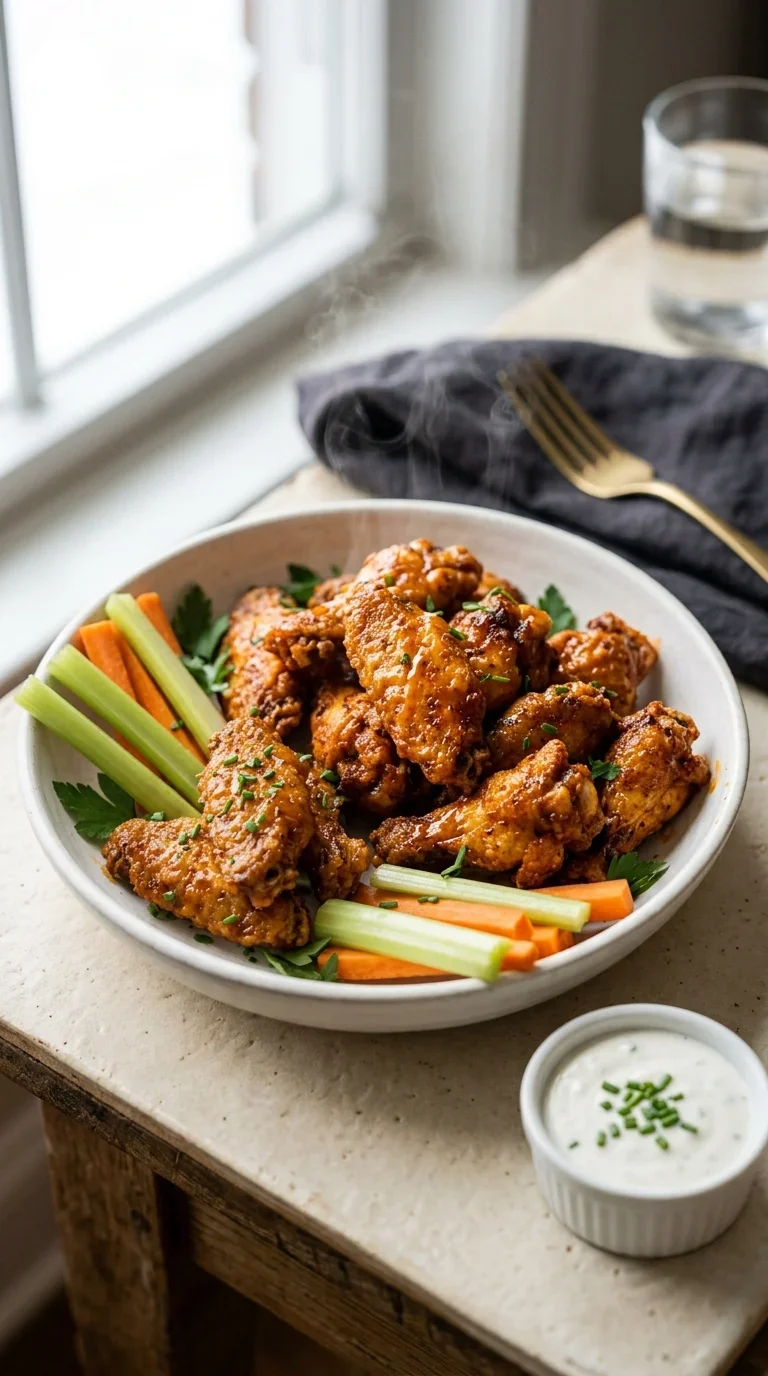
Chicken wings were once considered a throwaway part of the bird, often relegated to stocks or soups until a chance encounter in Buffalo, New York, changed everything in the 1960s. The transformation of the wing from a scrap to a global phenomenon began with a simple deep-fry and a tangy vinegar-based sauce, sparking a cultural shift in how we think about finger foods.
Over the decades, the love for the wing evolved, moving from sports bars into home kitchens where health-conscious cooks sought ways to replicate that signature snap. The discovery that alkaline agents, like baking powder, could break down proteins in the skin to create tiny bubbles led to the rise of the extra crispy baked chicken wings we enjoy today.
This method honors the tradition of the Buffalo wing while embracing the comfort of home baking. It's a reflection of how we adapt traditions—keeping the soul of the flavor while making the process a little kinder to our kitchens and our health.
Why You'll Love It
-
- Honestly, the crunch on these is just something else. It's that satisfying snap you usually only get from a deep fryer, but without all that heavy oil cluttering up the kitchen.
-
- I love that it comes with three different sauces. Whether you're in the mood for something spicy or a bit of sweetness, there's something for everyone at the table, yeah?
-
- It's just so grounding to have a reliable game-day snack. I remember when I first tried the baking powder trick, and wow, it completely changed how I do wings.
-
- Well, look, it's a simple process that feels fancy. You get that deep golden-brown color and a juicy inside that just makes the whole house smell like a cozy Sunday afternoon.
"I honestly can't believe these aren't fried. That crunch is just wonderful, and my kids loved the honey garlic sauce!"
Essential Ingredient Guide
- 2 lbs chicken wings: I always tell folks to pat these bone-dry with paper towels first. If they're even a little damp, you'll lose that lovely crisp we're after.
- 2 tsp baking powder: Now, make sure it's actually baking powder and not baking soda, oops! It helps the skin bubble up and get that wonderful, airy crunch.
- 1 tbsp olive oil (optional for coating): I find a little bit of this helps the spices stick just right. It's not strictly necessary, but it gives the coating a nice, smooth finish.
- 1 tsp smoked paprika: This gives the wings a beautiful, warm color and a hint of woodsy flavor. It's one of those little things that makes them taste professional.
- 1 tbsp rice vinegar: Used in a couple of the sauces, this adds a bright, sharp little note. It cuts right through the richness of the chicken, so perfectly.
- 1/4 cup honey: I use this for the Honey Garlic and Asian Soy Ginger options. It creates a glossy, sticky glaze that's just a treat, though a little goes a long way.
Complete Cooking Process
-
Getting Ready:
Everything starts with getting those 2 lbs chicken wings completely dry. I take my time with the paper towels because, honestly, moisture is the enemy here.
-
Building the Flavor:
Whisking together the baking powder, sea salt, black pepper, garlic powder, smoked paprika, onion powder, and cayenne pepper creates a savory base. It's such a fragrant mix that just hints at how good they'll be.
-
Perfecting the Crunch:
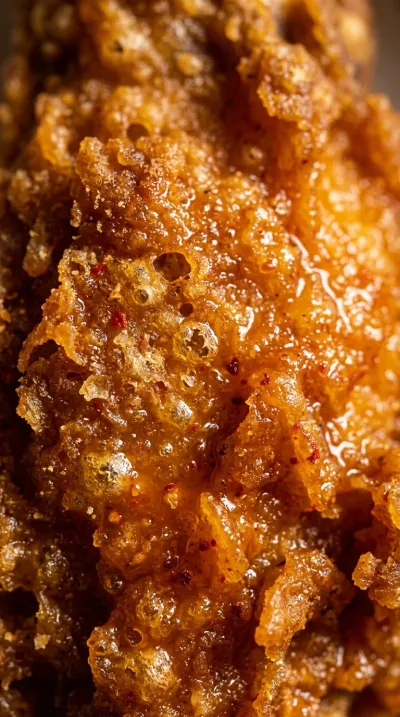
The magic happens on the wire rack. By letting the heat circulate all around the wings for about 40-45 minutes, the skin gets deep golden-brown without getting soggy.
-
The Final Glaze:
After a quick 5-minute rest to let the steam escape, you can toss them in your choice of sauce. I like to whisk the butter, hot sauce, and garlic powder for that classic buffalo feel.
-
The Perfect Moment:
These are best served immediately while they're still piping hot. There's nothing quite like that first bite when the skin is at its peak crispness.
-
Always use baking powder, not baking soda, to get that specific skin texture.
-
Don't crowd the baking sheet; leave space between each wing so they can breathe.
-
Use a meat thermometer to make sure they hit 165°F for safety and juiciness.
-
For an even bigger crunch, try a light sprinkle of semolina or cornmeal over the coating.
Pro Tips
Just take your time and you'll do wonderful!
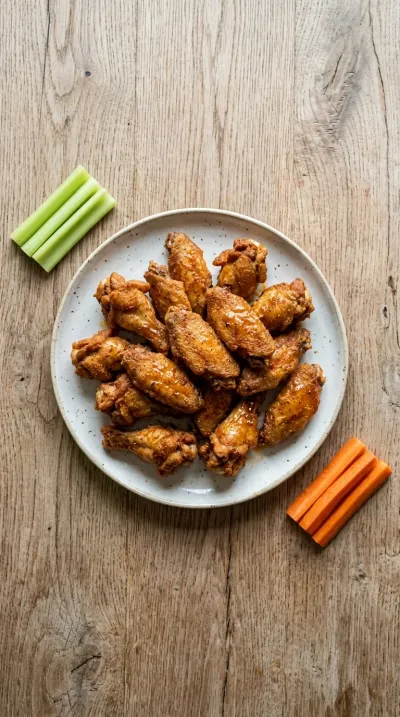
Better For You Treats
I like to think of these as a mindful way to enjoy a favorite. By baking instead of frying and pairing them with fresh celery and carrot sticks, you get a high-protein snack that feels lighter on the stomach.
Ways to Make it Your Own
You can really play around with these! I love tossing them in some grated Parmesan cheese for a savory crust, or brushing them with a mix of gochujang, honey, and soy sauce for a little Korean flair.
Serving Suggestions
I usually put mine on a big wooden platter with a bowl of blue-cheese dressing. If you're having a crowd, a mini finger-food bar with all three sauces and some tangy coleslaw is just the way to go.
Frequently Asked Questions
→ Can I use baking soda instead of baking powder?
Oh, I wouldn't do that! Baking soda tastes metallic and won't give you that same light, crispy skin that the baking powder does.
→ How do I stop the wings from sticking to the pan?
Just use a piece of parchment paper and a wire rack. It keeps the wings lifted so the air can get underneath, and cleanup is a breeze, too.
→ What if I don't have a meat thermometer?
I mean, you can look for that deep golden-brown color, but a thermometer is the only way to be sure they're done without overcooking them.
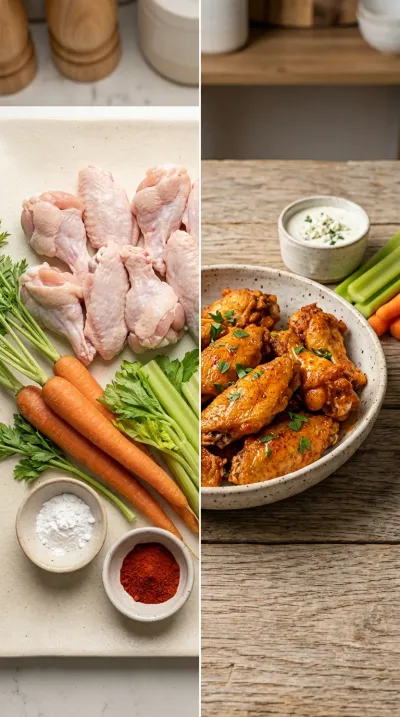
Nutrition Facts
per serving
320
Calories
24g
Protein
6g
Carbs
22g
Fat
Taste Profile
A savory, well-seasoned crunch with customizable flavor profiles from tangy to sweet.
Ingredient Substitutions
Don't have an ingredient? Try these alternatives
Adjust slightly as kosher salt is coarser.
Any high-smoke point oil works perfectly.
Adds a slightly different, woody sweetness.
Recipe Variations
Try these delicious twists on the original
Parmesan Crusted Baked Wings
For a savory, cheesy twist, toss the wings in grated Parmesan cheese right after the baking powder coating.
Gochujang Glazed Wings
Give these a Korean flair by brushing them with a mix of gochujang, honey, soy sauce, and a touch of sesame oil.
Common Mistakes to Avoid
Learn from others' mistakes for perfect results
- Using baking soda instead of baking powder, which ruins the texture.
- Crowding the pan, which prevents the wings from crisping.
- Skipping the drying process, leading to soggy skin.
Meal Prep & Storage
Make Ahead Tips
The wings can be coated and stored in the fridge for a few hours, but for the best crunch, bake them fresh. Sauces can be made a day in advance.
Leftover Ideas
Store cooled wings in an airtight container. Reheat them in the oven at 375°F for about 10 minutes to bring back that crispiness.
Perfect Pairings
Serve this with...
Cooking Timeline
Preheat oven and prepare baking sheet with rack
Pat wings dry and mix the seasoning coating
Toss wings in coating and arrange on rack
Bake wings, flipping halfway through
Rest wings and prepare sauces for serving
 Sweet Bakes & Desserts
Butter Pecan Ice Cream Recipe
Creamy homemade butter pecan ice cream with crunchy pecans and a buttery finish.
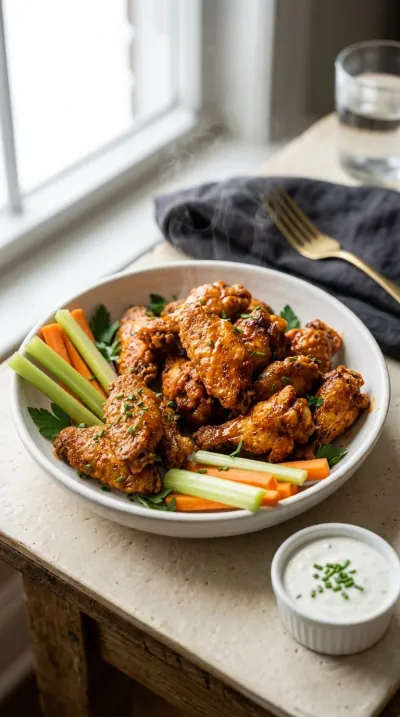
Extra Crispy Baked Chicken Wings
Warm up your kitchen with the scent of extra crispy baked chicken wings, seasoned with baking powder and smoked paprika for a perfect crunch. These golden bites are paired with three soulful sauces that make every gathering feel like home.
Timing
Prep Time
15 Minutes
Cook Time
45 Minutes
Total Time
60 Minutes
Recipe Details
Ingredients
Wing Coating
-
01
2 lbs chicken wings
-
02
2 tsp baking powder
-
03
1 tsp sea salt
-
04
1 tsp black pepper
-
05
1 tsp garlic powder
-
06
1 tsp smoked paprika
-
07
1 tsp onion powder
-
08
½ tsp cayenne pepper
-
09
1 tbsp olive oil (optional for coating)
Buffalo Sauce
-
01
½ cup butter, melted (Buffalo sauce)
-
02
⅓ cup hot sauce (Buffalo sauce)
-
03
1 tsp garlic powder (Buffalo sauce)
Honey Garlic Sauce
-
01
¼ cup honey (Honey Garlic sauce)
-
02
2 tbsp soy sauce (Honey Garlic sauce)
-
03
2 tbsp water (Honey Garlic sauce)
-
04
1 tbsp rice vinegar (Honey Garlic sauce)
-
05
1 garlic clove, minced (Honey Garlic sauce)
-
06
1 tsp grated ginger (Honey Garlic sauce)
Asian Soy Ginger Sauce
-
01
¼ cup soy sauce (Asian Soy Ginger sauce)
-
02
2 tbsp honey (Asian Soy Ginger sauce)
-
03
1 tbsp rice vinegar (Asian Soy Ginger sauce)
-
04
1 tbsp sesame oil (Asian Soy Ginger sauce)
-
05
2 garlic cloves, minced (Asian Soy Ginger sauce)
-
06
1 tsp grated ginger (Asian Soy Ginger sauce)
-
07
½ tsp red pepper flakes (Asian Soy Ginger sauce)
Instructions
First things first, let's get that oven warming up to 425°F (220°C). I like to line my baking sheet with parchment paper and set a wire rack right on top—it just lets the air move around better, you know?
Now, take a moment to pat the chicken wings dry with some paper towels. Honestly, don't skip this; getting rid of that extra moisture is the secret to getting them truly crispy.
In a large bowl, whisk together your baking powder, salt, pepper, garlic powder, paprika, onion powder, and cayenne pepper. If you're feeling like it, stir in that tablespoon of olive oil to help everything stick just right.
Toss those wings in the spice mixture until every single piece is well coated. Shake off any extra bits and lay them out in a single layer on your wire rack. Just make sure they have a little breathing room between them.
Pop them in the oven for 20 minutes, then carefully flip them over. Bake for another 20-25 minutes until the skin is a beautiful, deep golden-brown. I always use a meat thermometer to make sure they've hit 165°F (74°C) inside.
Once they're out, let the wings rest on the rack for about 5 minutes. I know it's hard to wait, but it lets the steam escape so the skin stays nice and crisp.
While those are resting, whisk together your chosen sauce ingredients in separate bowls. If you're doing the Buffalo, I usually warm it in a small saucepan for a smoother blend, but the others are just fine chilled for dipping.
Serve your wings while they're still hot! I love putting them out with some fresh celery sticks, carrot sticks, and a little sprinkle of fresh herbs to make it feel special.
Notes & Tips
-
1
Baking powder is the key here—it reacts with the skin to create those tiny bubbles that crisp up.
-
2
Using a wire rack prevents the bottoms from getting soggy.
-
3
Resting the wings is a small step that makes a huge difference in the final crunch.
 One-Pan & One-Pot Meals
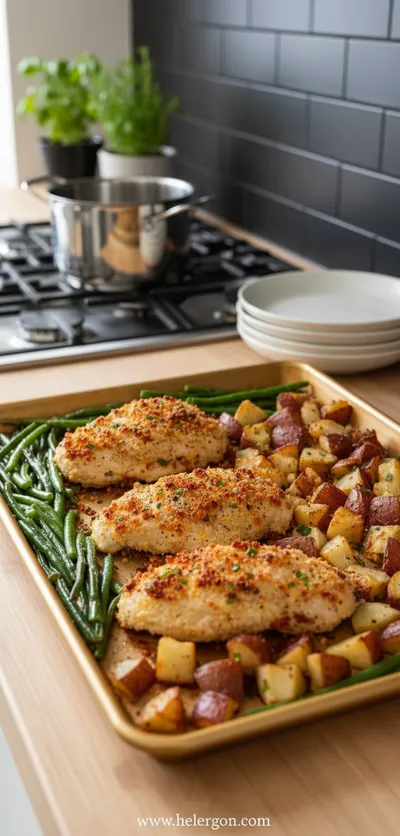
Parmesan Crusted Chicken Sheet Pan Dinner
One‑pan Parmesan chicken with golden crust and roasted veggies, ready in under an hour.
Tools You'll Need
-
Oven for high-heat roasting
-
Baking sheet to catch drips
-
Wire rack for maximum airflow
-
Large mixing bowl for tossing wings
-
Small saucepan for warming buffalo sauce
-
Whisk for smooth sauces
-
Measuring spoons for precise seasoning
-
Tongs for flipping wings
-
Meat thermometer to ensure safety
Must-Know Tips
-
Dry the chicken, Moisture is the enemy of crispness; pat them dry very well.
-
Baking powder only, Use baking powder, not baking soda, as the acid helps the skin crisp up.
-
Add a crunch booster, Sprinkle a thin layer of semolina or cornmeal over the coating for extra crunch.
Professional Secrets
-
The 'dry-brine' effect of baking powder changes the pH of the skin, allowing it to brown and crisp like it was fried.
-
The 5-minute rest period is essential to prevent the wings from steaming themselves soft.
-
Using a high oven temperature (425°F) quickly renders the fat for a thinner, crispier skin.
What readers are saying
Community reviews from home cooks like you
Good, but not amazing. The wings flavor was nice, but i added a bit more seasoning next time. I might try it again with some adjustments.
The flavors were spot on. I really liked how the 2 lbs chicken wings and 2 tsp baking powder came together. I added a bit more seasoning next time. Great addition to my recipe rotation.
I wanted to love this dish, but it didn't quite work for me. The texture was a touch off, but the flavor saved it. I think with some tweaks it could be really good.
Good, but not amazing. The wings flavor was nice, but i would reduce the salt a little. I might try it again with some adjustments.
Absolutely loved this recipe! I really liked how the 2 lbs chicken wings and 2 tsp baking powder came together. Great addition to my recipe rotation.

Get Delicious Recipes Weekly
Join 25,000+ home cooks getting our best recipes straight to their inbox.
Free forever • No spam • Unsubscribe anytime