
Granola bars emerged in the late 19th century as a convenient way to pack wholesome grains for hikers and soldiers. The concept of combining oats, sweeteners, and dried fruit without baking was born out of necessity, providing energy that could be stored for long journeys. Today, they remain a beloved pantry staple, bridging the gap between tradition and modern on‑the‑go lifestyles.
Why You'll Love It
-
- No oven needed, so it’s perfect for summer kitchens
-
- Quick prep, under 20 minutes from start to finish
-
- Customizable with your favorite nuts or dried fruit
-
- Naturally sweetened, no refined sugars required
"These bars are my new go‑to snack—soft, sweet, and just the right bite!"
Essential Ingredient Guide
- Rolled oats: Choose thick‑cut oats for chewiness; toast lightly for extra nuttiness
- Honey: Acts as the binder; you can swap with maple syrup for a vegan twist
- Mixed nuts: Add crunch and healthy fats; rough‑chop for even distribution
- Dried fruit: Provides bursts of natural sweetness; pat dry to avoid soggy bars
- Brown sugar: A touch of caramel depth; dissolve fully in the melt
- Butter: Gives richness and helps the mixture set; keep it at room temperature
Complete Cooking Process
-
Ingredient Readiness:
Measure oats, chop nuts, and pat dry dried fruit; melt butter, honey, and brown sugar together.
-
Flavor Development:
While the butter mixture simmers, toast oats briefly for a toasted aroma.
-
Texture Control:
Stir in nuts and fruit while the mixture is still warm to coat evenly.
-
Finishing Touches:
Press the mixture firmly into a lined pan, chill until set.
-
Serving Timing:
Slice into bars after at least 30 minutes of refrigeration for clean cuts.
-
Press the mix with a piece of parchment paper to avoid sticking
-
Rotate the pan halfway through chilling for even firmness
-
Add a pinch of sea salt to lift the sweetness
-
Swap half the oats for puffed rice for a lighter bite
Pro Tips
Well, these little tweaks make a world of difference. I often find the bars taste even better the next day, when the flavors have had time to meld. So feel free to make them ahead and store them in a tin; they’ll stay fresh for about a week.
 Breakfast & Brunch
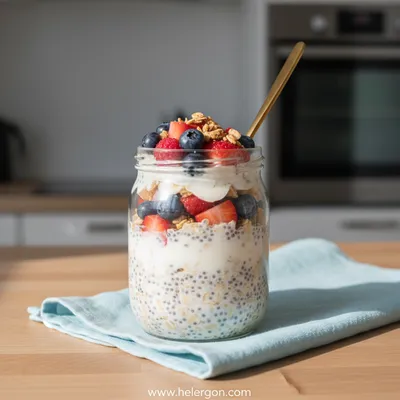
Healthy Overnight Oats with Chia Seeds & Yogurt
A soothing blend of oats, chia, and yogurt that wakes you up gently.
The essence of the dish:
The bars rely on the natural stickiness of honey and melted butter to hold oats, nuts, and fruit together, creating a chewy, slightly crunchy treat that’s satisfying at any hour.
A fun fact or historical angle:
Did you know the original granola was a health food championed by the early 1900s "Sanitary Health Food Association"? It was meant to be a wholesome, portable meal for the busy urban worker.
Flavor or sensory focus:
You’ll notice the warm caramel scent from the honey‑brown‑sugar blend, the toasted oat backdrop, and the bright pop of dried fruit when you bite.
You Must Know
-
Use a sturdy pan that can hold the weight of the mixture
-
Do not over‑heat the butter blend, or it can scorch
-
Allow the bars to cool completely before slicing
Frequently Asked Questions
→ Can I make these bars vegan?
Yes, simply replace butter with coconut oil and honey with maple syrup or agave nectar.
→ How long do the bars keep?
Stored in an airtight container, they stay fresh for up to 7 days at room temperature or 2 weeks refrigerated.
→ What can I substitute for dried fruit?
Swap in chocolate chips, shredded coconut, or even freeze‑dried berries for a different texture.
→ Do I need to toast the oats?
It’s optional, but a quick toast brings out a nutty aroma and adds extra crunch.
→ Can I add protein powder?
Absolutely—mix in a scoop of your favorite protein powder, reducing a bit of the honey if needed.
→ Are these bars gluten‑free?
Use certified gluten‑free oats and ensure all add‑ins are gluten‑free; otherwise the base is naturally gluten‑free.
Nutrition Facts
per serving
210
Calories
4g
Protein
28g
Carbs
9g
Fat
Taste Profile
A gently sweet, nutty snack with subtle caramel notes
Ingredient Substitutions
Don't have an ingredient? Try these alternatives
Use the same amount; the flavor becomes milder and more earthy
Great for nut‑allergy friendly version; keep the same quantity
Recipe Variations
Try these delicious twists on the original
Chocolate Version
Add 1/4 cup cocoa powder to the dry mix and drizzle melted dark chocolate on top before chilling.
Peanut Butter Crunch
Stir in 2 tbsp natural peanut butter and sprinkle chopped peanuts for extra richness.
Common Mistakes to Avoid
Learn from others' mistakes for perfect results
- Over‑heating the butter mixture, causing a burnt taste
- Not pressing the mixture firmly, leading to crumbly bars
- Skipping the refrigeration step, which makes slicing difficult
Meal Prep & Storage
Make Ahead Tips
You can prepare the mixture and chill it up to 24 hours ahead; just keep it wrapped in plastic to maintain freshness.
Leftover Ideas
Reheat gently in a microwave for 10‑15 seconds if you prefer a softer texture, or enjoy cold straight from the fridge.
Perfect Pairings
Serve this with...
Cooking Timeline
Gather and measure all ingredients; line the pan with parchment.
Melt butter, honey, and brown sugar together until smooth.
Combine dry ingredients, pour melted mixture over, and stir to coat.
Press mixture into pan, chill in refrigerator.
Let bars set, then slice and store.
 Sweet Bakes & Desserts
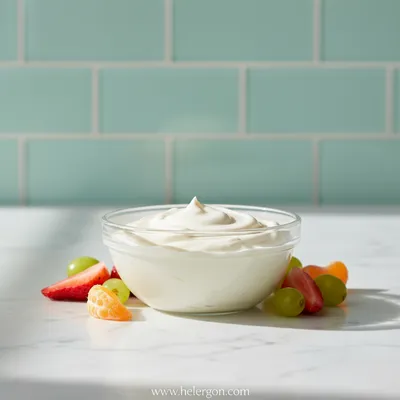
Cream Cheese Fruit Dip – Easy Sweet Snack
Creamy cheese fruit dip perfect for parties – smooth, tangy, and effortlessly sweet.
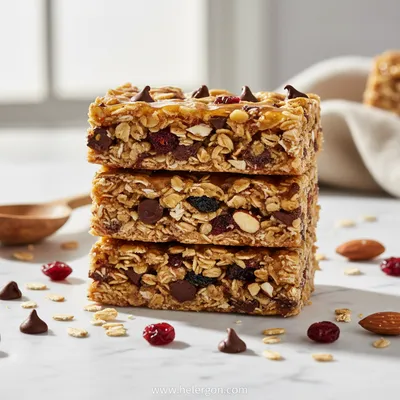
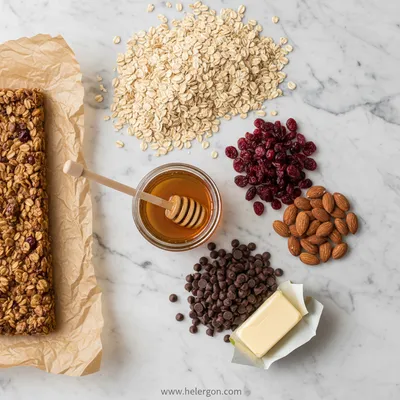
No Bake Granola Bars – Easy Homemade Snack
Quick, no‑bake granola bars that blend oats, honey, dried fruit, and a hint of butter for a chewy, portable snack – perfect for busy mornings or an afternoon pick‑me‑up.
Timing
Prep Time
15 Minutes
Cook Time
0 Minutes
Total Time
45 Minutes
Recipe Details
Ingredients
Main Ingredients
-
01
2 cups rolled oats
-
02
1/2 cup mixed nuts, roughly chopped
-
03
1/2 cup dried fruit (cranberries, raisins, apricots)
-
04
1/3 cup honey
-
05
1/4 cup brown sugar
-
06
1/4 cup unsalted butter
-
07
1/2 tsp vanilla extract
-
08
Pinch of sea salt
Instructions
In a large saucepan over low heat, melt butter, honey, and brown sugar together, stirring until smooth.
Remove from heat and stir in vanilla and sea salt.
In a big mixing bowl, combine oats, chopped nuts, and dried fruit; pour the warm butter mixture over them.
Mix quickly until everything is evenly coated. Press the mixture firmly into a parchment‑lined 8×8‑inch pan.
Refrigerate for at least 30 minutes, then cut into 12 bars. Store in an airtight container.
Notes & Tips
-
1
If the mixture feels too crumbly, add a tablespoon more melted butter.
-
2
For a chocolate twist, drizzle melted dark chocolate over the top before chilling.
-
3
These bars are excellent for a quick breakfast; pair with a cup of tea.

Tools You'll Need
-
Saucepan
-
Mixing bowl
-
Spatula
-
8×8‑inch baking pan
-
Parchment paper
-
Refrigerator
Must-Know Tips
-
Don’t over‑heat the butter mixture; it can burn quickly
-
Press the bars firmly to avoid crumbling later
-
Cool the pan on the counter for a few minutes before refrigerating
Professional Secrets
-
Room‑temperature butter blends more smoothly with honey
-
A pinch of salt amplifies the sweetness without making it salty
-
Chilling the bars solidifies the honey, giving a clean slice

Get Delicious Recipes Weekly
Join 25,000+ home cooks getting our best recipes straight to their inbox.
Free forever • No spam • Unsubscribe anytime