
The concept of brookies emerged from the American tradition of "hybrid desserts," a culinary trend where two beloved classics are merged to create a new, singular experience. While the brownie itself rose to popularity in the late 19th century, the fusion of a chocolate chip cookie and a brownie reflects a more modern desire for texture and contrast within a single serving.
Culturally, these bars represent the comfort of home baking and the versatility of the American kitchen. By combining the richness of unsweetened cocoa powder with the buttery sweetness of a traditional cookie, the dish achieves a balance of flavors that appeals to all ages. It transforms two distinct treats into a cohesive, shared experience.
Over time, the brookie has evolved from a home-cook's whim into a beloved staple of bake sales and family gatherings. The appeal lies in the layers—the way the dense, fudgy bottom supports the softer, chewier top—creating a sensory journey that celebrates the best of both confectionery worlds.
Why You'll Love It
-
- Honestly, it is just the best of both worlds; you get that fudgy brownie soul and a soft cookie hug all in one bite.
-
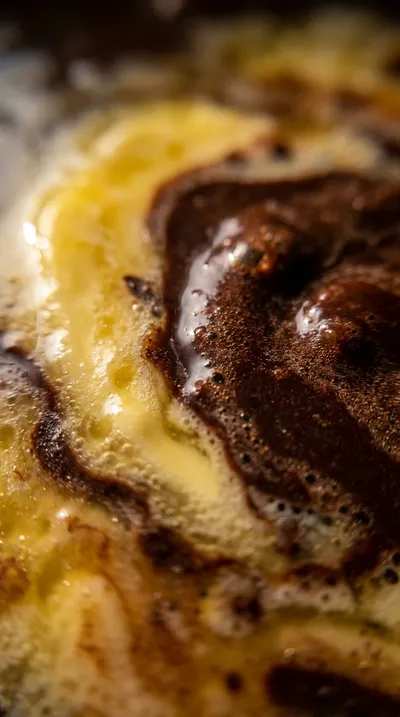
- I remember when I first made these, the smell of melting butter and cocoa filled my whole kitchen, and it felt so cozy.
-
- Well, look, it is a total crowd-pleaser that doesn't require any fancy tricks, just simple ingredients and a bit of love.
-
- Dang, that chewy texture is just wonderful, and the way the chocolate chips melt into the layers is pure magic.
"Honestly, these are the only treats my kids ask for now. Just so chewy and rich!"
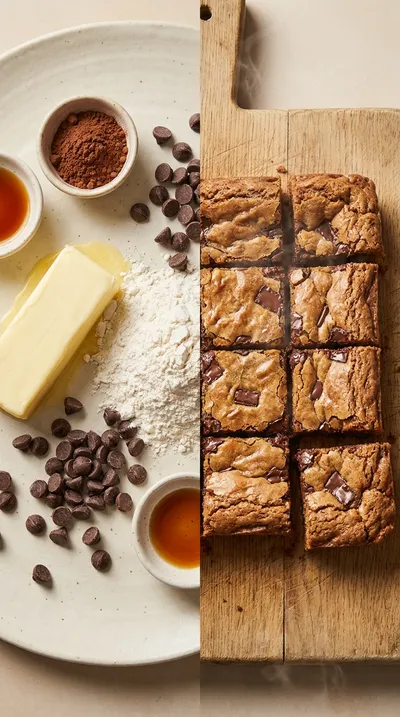
Essential Ingredient Guide
- 1 cup (2 sticks) unsalted butter, melted: I always melt mine slowly so it doesn't get too hot. It gives the cookie layer such a rich, buttery base that just melts in your mouth.
- ½ cup unsweetened cocoa powder: This is where that deep, chocolatey heart of the brownie comes from. I like to sift it just a bit so there are no little lumps in the batter.
- 1 cup chopped walnuts (optional): Now, these add a lovely little crunch that breaks up the richness. I only add them if I'm feeling a bit fancy, but they really do a lot for the texture.
- ¾ teaspoon salt: Don't go skipping this, okay? A pinch of salt actually wakes up all that chocolate and sugar, making everything taste more balanced.
- 1 teaspoon vanilla extract: I use a splash in both layers because it adds a warmth that you can't quite put your finger on, but you'd certainly miss it.
- 1 ½ cups granulated sugar: This gives the cookie part its structure and that classic sweetness. Just stir it in well with the butter until it's nice and smooth.
Complete Cooking Process
-
Ingredient Readiness:
Start by getting your 1 cup (2 sticks) unsalted butter, melted and ready. I also find that using room temperature eggs makes the batter come together much smoother, so let them sit out for a bit.
-
Flavor Development:
The magic happens when you whisk the ½ cup unsweetened cocoa powder and ½ cup packed light brown sugar with the oil. That's when that deep, fudgy brownie aroma really starts to wake up.
-
Texture Control:
Be careful not to overmix the flour in either layer, or you'll lose that tenderness. The goal is for the center to stay slightly fudgy, so keep a close eye on the clock.
-
Finishing Touches:
If you're feeling playful, you can swirl the two batters with a knife for a pretty marbled look. Just a few gentle turns is all you need before they head into the oven.
-
Serving Timing:
Now, this is the hard part: you must let them cool completely in the pan. If you cut them too soon, they might fall apart, and we want those perfect, chewy squares.
-
Don't overbake! Start checking for doneness at 25 minutes so they stay fudgy.
-
Use room temperature eggs for a more even bake and a smoother batter.
-
For extra gooey results, try reducing the baking time by a few minutes.
-
Line your pan with parchment paper and leave an overhang for an easy lift.
Pro Tips
Just trust your instincts and enjoy the process!
 Easy Weeknight Dinners
Thai Shrimp Wraps – Flavor-Packed Easy Dinner
Crispy, aromatic shrimp wrapped in lettuce, perfect for a quick, flavorful dinner.
Better For You Treats
Ways to Make it Your Own
Serving Suggestions
Frequently Asked Questions
→ How do I know when the brookies are actually done?
Stick a toothpick in the center; it should come out with some moist crumbs, not wet batter, but the center should still feel a bit fudgy.
→ Can I store these for later?
Yes, just put them in an airtight container for up to 3 days, or wrap them individually and freeze them for up to 2 months.
→ Do I really need the parchment paper?
I'd say so, yeah. It makes lifting the whole block out of the pan so much easier, which means no crumbled edges.
Nutrition Facts
per serving
380
Calories
6g
Protein
45g
Carbs
18g
Fat
Taste Profile
A rich, deeply sweet harmony of buttery vanilla cookie and intense cocoa brownie.
Ingredient Substitutions
Don't have an ingredient? Try these alternatives
If using salted butter, reduce the added salt in the recipe by a pinch.
Pecans provide a similar crunch and a slightly sweeter flavor.
Works well and adds a very subtle coconut note.
Recipe Variations
Try these delicious twists on the original
Salted Caramel Brookies
For a bit of a twist, add ½ cup of caramel bits and a little sprinkle of sea salt on top of the brownie layer before you pop them in the oven.
Peanut Butter Brookies
If you love that classic combo, swirl in 2 tablespoons of peanut butter into the brownie batter before baking for a nutty, salty kick.
Common Mistakes to Avoid
Learn from others' mistakes for perfect results
- Overmixing the batter, which can lead to a tough, bread-like texture instead of a chewy one.
- Overbaking the bars; if the toothpick is completely clean, they might be too dry.
- Cutting the bars while they are still hot, which can cause them to fall apart or look messy.
Meal Prep & Storage
Make Ahead Tips
You can bake these and store them in an airtight container for 3 days, or wrap them individually and freeze them for up to 2 months for a quick treat.
Leftover Ideas
Store leftovers in an airtight container at room temperature. If you like them warm, just pop a square in the microwave for 10 seconds.
Perfect Pairings
Serve this with...
Cooking Timeline
Preheat oven to 350°F and line the 9x13 pan with parchment paper.
Cream butter and sugar, add eggs and vanilla, and mix in the first set of dry ingredients.
Stir in chocolate chips and spread the cookie layer into the pan.
Prepare the brownie batter, layer it on top, fold in dry ingredients and walnuts.
Bake for 25-30 minutes and let the bars cool completely before cutting.
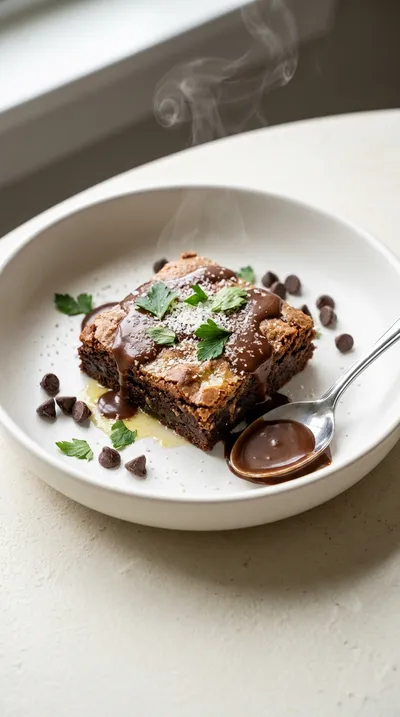
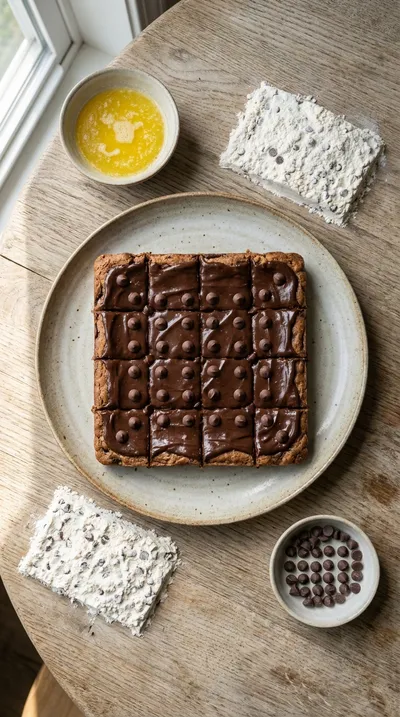
Best Brookies Recipe – Chewy Cookie‑Brownie Bars
Sink your teeth into these gooey brookies, where fudgy chocolate and golden cookie dough live in perfect harmony. It is a warm, chocolatey embrace in every single bite.
Timing
Prep Time
20 Minutes
Cook Time
25-30 Minutes
Total Time
45-50 Minutes
Recipe Details
Ingredients
Cookie Layer
-
01
1 cup (2 sticks) unsalted butter, melted
-
02
1 ½ cups granulated sugar
-
03
2 large eggs
-
04
1 teaspoon vanilla extract
-
05
1 ¾ cups all-purpose flour
-
06
¾ teaspoon baking soda
-
07
¾ teaspoon salt
-
08
¾ cup semi-sweet chocolate chips
Brownie Layer
-
01
½ cup unsweetened cocoa powder
-
02
½ cup packed light brown sugar
-
03
¼ cup vegetable oil
-
04
1 large egg
-
05
1 teaspoon vanilla extract
-
06
1 ½ cups all-purpose flour
-
07
1 teaspoon baking powder
-
08
¼ teaspoon salt
-
09
1 cup chopped walnuts (optional)
Instructions
Start by preheating your oven to 350°F (175°C). I like to line my 9x13 inch baking pan with parchment paper, leaving a little overhang on the sides—it makes lifting the bars out so much easier later on, believe me.
In a large mixing bowl, combine that melted butter and granulated sugar. Give it a good beat with your electric mixer until it feels smooth and well combined. It's such a sweet start.
Now, add the eggs one at a time. Be sure to beat them in well after each one so the batter stays creamy. Stir in your vanilla extract for that lovely aromatic touch.
In a separate bowl, just whisk together your flour, baking soda, and salt. Gradually add these dry ingredients into the wet mixture. Now, look, be careful not to overmix here; we want them chewy, not tough.
Gently stir in those semi-sweet chocolate chips. Go ahead and pour half of this cookie batter into your prepared pan, spreading it out evenly to create our foundation.
For the brownie part, grab a medium bowl and whisk together the cocoa powder, brown sugar, vegetable oil, egg, and vanilla extract. Mix it until it's nice and smooth.
Carefully pour that rich brownie batter right over the cookie layer. Spread it evenly. If you're feeling fancy, you can swirl them slightly with a knife for a pretty marbled effect.
In a small bowl, whisk your remaining flour, baking powder, and salt together. Gently fold this into the brownie batter. If you're using the chopped walnuts, stir them in now.
Bake for 25-30 minutes. You'll know they're done when a toothpick in the center comes out with moist crumbs. The edges should be set, but the center needs to stay a bit fudgy—that's the secret.
Now comes the hard part: let the Brookies cool completely in the pan. Then, use that parchment overhang to lift them out, cut them into squares, and enjoy.
Notes & Tips
-
1
Watch the clock closely; start checking for doneness right at 25 minutes to avoid overbaking.
-
2
Room temperature eggs are a must for a smoother batter and a more consistent bake.
-
3
For those who prefer a truly gooey center, feel free to pull them out a few minutes early.

Tools You'll Need
-
9x13 inch baking pan for the perfect bar shape
-
Parchment paper for a clean release
-
Mixing bowls (2 large, 1 medium) to keep your layers separate
-
Electric mixer (handheld or stand) for beating the butter and sugar
-
Measuring cups and spoons for accuracy
-
Spatula for spreading the batter evenly
Must-Know Tips
-
Don't overbake, The Brookies are meant to be fudgy; checking at 25 minutes is key.
-
Temperature matters, Room temperature eggs help the batter emulsify for a better texture.
-
Custom gooeyness, Reducing the bake time by a few minutes creates a more melted center.
Professional Secrets
-
The Marbling Technique: Using a knife to gently swirl the brownie and cookie layers creates a professional, bakery-style look.
-
The Parchment Slingshot: Leaving an overhang on the parchment allows you to lift the entire block of bars without breaking them.
-
Avoid Overmixing: Stopping the mixer as soon as the flour disappears ensures the cookies remain tender rather than cakey.

Get Delicious Recipes Weekly
Join 25,000+ home cooks getting our best recipes straight to their inbox.
Free forever • No spam • Unsubscribe anytime