
The American chocolate chip cookie is a mid-century marvel, born from the ingenuity of home cooks who sought to combine the richness of butter and brown sugar with the deep cocoa of chocolate. While the traditional round cookie is iconic, the evolution into the format of chewy chocolate chip cookie bars reflects a shift toward communal, shareable baking and the practical need for efficiency in a busy household.
These bars rely on a delicate balance of leavening from baking soda and the moisture of eggs to create a texture that sits right between a cake and a cookie. The use of both granulated sugar and brown sugar is a cultural hallmark of the classic American treat, providing a complex sweetness and a characteristic moistness that defines the "chewy" experience.
Baking in a single pan has long been a staple of potlucks and school bake sales, turning a labor-intensive process into a generous batch of comfort. It is a style of baking that emphasizes abundance and warmth, designed to be sliced and passed around a crowded table.
Why You'll Love It
-
- Honestly, there is something so nostalgic about that sweet, buttery scent filling the kitchen; it just feels like home.
-
- Well, look, the best part is that you don't have to scoop individual cookies, so it's just much easier to share with the grandkids.
-
- I mean, that specific chewiness is just wonderful, and the way the semi-sweet chocolate chips melt into every single bite is just heaven.
-
- Yeah, it's a real crowd-pleaser that's simple enough for a Tuesday but feels special enough for a Sunday afternoon tea.
"Honestly, these are exactly how I remember my grandmother's baking. So soft and just the right amount of sweet!"
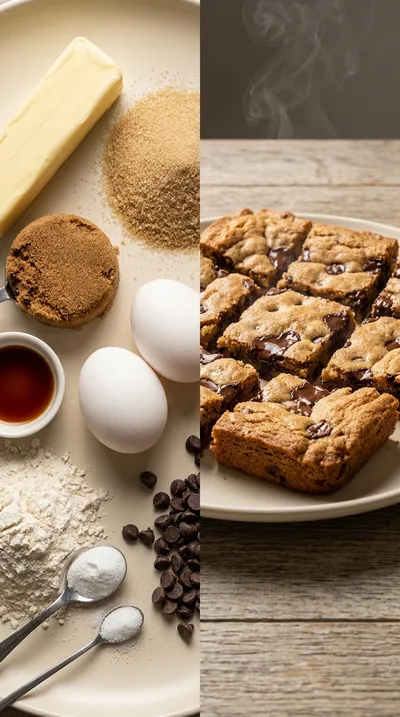
Essential Ingredient Guide
- 1 cup (2 sticks) unsalted butter, softened: I always make sure my butter is truly softened, not melted, or the bars won't have that lovely structure. It's the heart of the richness here, so take your time letting it sit out.
- 2 cups semi-sweet chocolate chips: These little pockets of chocolate are what make the bars special. I love how they stay just a bit gooey if you don't overbake them.
- 1 teaspoon vanilla extract: Just a splash, but it rounds out all the sweetness. I remember my mother always said it's the secret to making things taste "homemade."
- 1 teaspoon salt: Don't be shy with the salt; it balances the sugar and makes the chocolate taste even deeper. It's a small touch, but it makes a big difference.
- 1 teaspoon baking soda: This gives us that gentle lift. I always whisk it in with the flour to make sure we don't get any funny little clumps in the dough.
- 3/4 cup packed brown sugar: This is where that deep, molasses-like flavor and the chewy texture come from. Just make sure you pack it firmly into the cup.
Complete Cooking Process
-
Getting Ready:
Before anything else, I let my 1 cup (2 sticks) unsalted butter, softened just right, sit on the counter. It's also so helpful to have your 2 1/4 cups all-purpose flour and other dry bits measured out so you aren't rushing.
-
Building the Flavor:
The magic happens when we cream the butter with the 3/4 cup granulated sugar and 3/4 cup packed brown sugar. That's where the air gets in and the flavors start to meld into something truly sweet.
-
Perfecting the Texture:
When adding the dry ingredients, I always go slow and stop as soon as it's combined. If you overmix, ugh, the bars get a bit too tough, and we want them soft and chewy.
-
The Final Touch:
Folding in those 2 cups semi-sweet chocolate chips is my favorite part. I just stir them in gently so every single square has plenty of chocolate.
-
The Patient Wait:
I know it's hard, but you've got to let them cool completely in the pan. If you cut them too soon, they might fall apart, and we want those clean, pretty squares.
-
Line your pan with parchment paper and leave an overhang to lift the bars out easily.
-
Cream the butter and sugars for 2-3 minutes to create those important air pockets.
-
Slightly underbake your bars if you prefer them extra chewy.
-
Use a toothpick to check the center; it should come out with moist crumbs.
Pro Tips
Just trust your instincts and your oven, and you'll do wonderful!
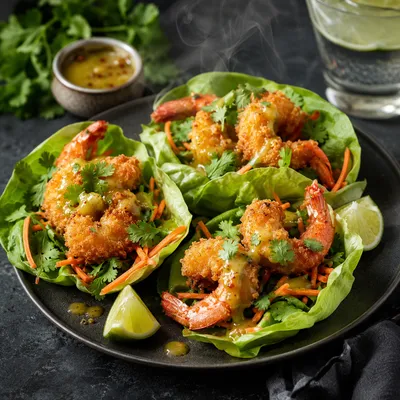 Easy Weeknight Dinners
Thai Shrimp Wraps – Flavor-Packed Easy Dinner
Crispy, aromatic shrimp wrapped in lettuce, perfect for a quick, flavorful dinner.
Better For You Treats
Ways to Make it Your Own
Serving Suggestions
Frequently Asked Questions
→ Can I use a different pan than a 9x13?
Well, you could, but your baking time will change. A 9x13 is just the best way to keep that chewy consistency across the whole batch.
→ Why are my bars too cakey instead of chewy?
Oops, you might have overmixed the flour or overbaked them. Next time, try taking them out just a minute early while the center still looks a tiny bit soft.
→ How do I keep them fresh for a few days?
Just pop them in an airtight container at room temperature for up to 3 days. If you can't eat them all, they actually freeze beautifully for up to 2 months!
Nutrition Facts
per serving
310
Calories
4g
Protein
36g
Carbs
16g
Fat
Taste Profile
A rich, classic balance of buttery sweetness and deep chocolate.
Ingredient Substitutions
Don't have an ingredient? Try these alternatives
Gives a richer, less sweet flavor
Works well for a gluten-free version
Recipe Variations
Try these delicious twists on the original
Peanut Butter Chocolate Chip Cookie Bars
For a nuttier twist, stir 1/2 cup of peanut butter into the wet ingredients with the eggs and vanilla. You can even toss in 1/2 cup of chopped peanuts for some extra crunch.
Salted Caramel Chocolate Chip Cookie Bars
Once they come out of the oven, drizzle some melted caramel over the top and finish with a sprinkle of flaky sea salt for a fancy touch.
Common Mistakes to Avoid
Learn from others' mistakes for perfect results
- Overmixing the batter, which makes the bars tough
- Overbaking, which removes that signature chewiness
- Forgetting the parchment paper, making removal difficult
Meal Prep & Storage
Make Ahead Tips
You can bake these in advance and keep them in an airtight container for 3 days, or freeze them for up to 2 months. Just thaw them completely before serving.
Leftover Ideas
Store any remaining bars in an airtight container at room temperature. If they've been frozen, let them thaw naturally.
Perfect Pairings
Serve this with...
Cooking Timeline
Preheat oven and line the baking pan with parchment
Cream butter and sugars, then beat in eggs and vanilla
Whisk dry ingredients and mix into the wet batter
Stir in chips, spread in pan, and bake for 25-30 minutes
Cool completely on a wire rack before cutting
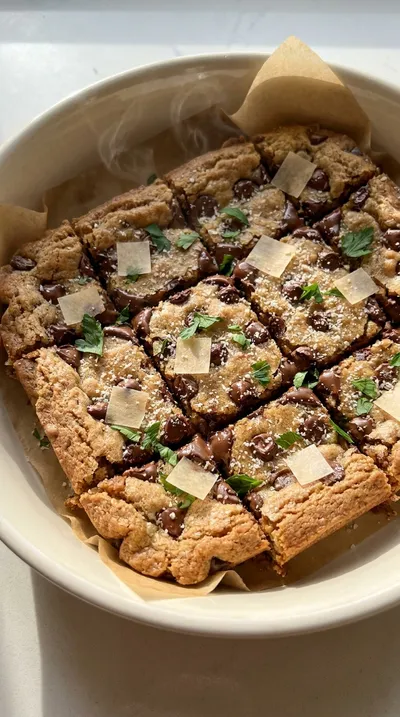
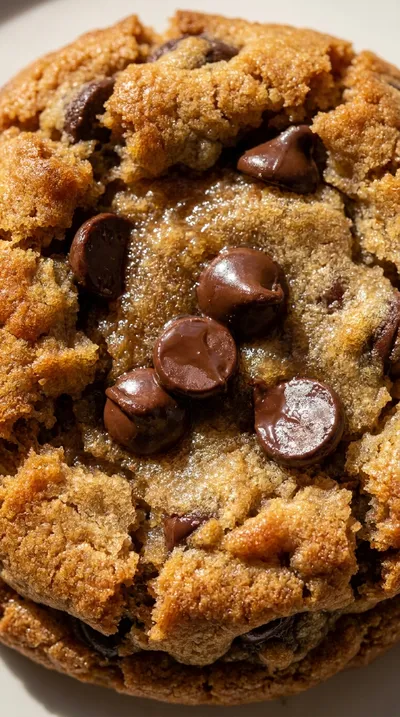
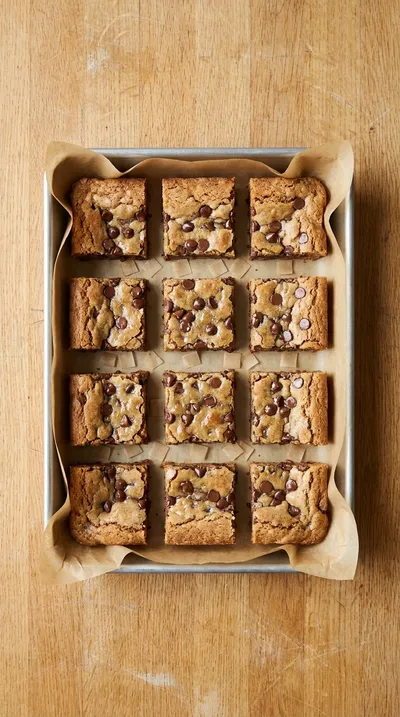
Chewy Chocolate Chip Cookie Bars
Warm your kitchen with the scent of brown sugar and vanilla. These chewy chocolate chip cookie bars are soft, buttery, and filled with plenty of semi-sweet chocolate chips for a cozy treat.
Timing
Prep Time
15 Minutes
Cook Time
25-30 Minutes
Total Time
40-45 Minutes
Recipe Details
Ingredients
Main Ingredients
-
01
1 cup (2 sticks) unsalted butter, softened
-
02
3/4 cup granulated sugar
-
03
3/4 cup packed brown sugar
-
04
2 large eggs
-
05
1 teaspoon vanilla extract
-
06
2 1/4 cups all-purpose flour
-
07
1 teaspoon baking soda
-
08
1 teaspoon salt
-
09
2 cups semi-sweet chocolate chips
Instructions
First things first, let's get the oven warmed up to 350°F (175°C). Now, take your 9x13 inch baking pan and line it with parchment paper. Make sure you leave a little overhang on the sides—honestly, it's the only way to get those bars out without a struggle!
Grab a large mixing bowl and cream together the softened butter, granulated sugar, and brown sugar. You'll want to keep going until it looks light and fluffy, which usually takes about 2-3 minutes with your mixer. It's such a comforting smell, isn't it?
Go ahead and beat in the eggs one at a time—don't rush this part. Then, stir in the vanilla extract until everything is just well combined.
In a separate medium bowl, whisk together the flour, baking soda, and salt. I always do this just to make sure the leavening and salt are spread out evenly, so no funny surprises in the dough.
Slowly add those dry ingredients into the wet mix. Use a low speed and stop as soon as they're just combined. Look, I've been there, but if you overmix it, the bars can get a bit too tough, and we want them chewy.
Now for the best part: stir in the 2 cups semi-sweet chocolate chips until they're evenly distributed through the dough.
Pour that lovely dough into your prepared pan. Use a spatula to spread it into an even layer so every piece is the same size.
Bake for 25-30 minutes. You're looking for golden brown edges and a center that's mostly set. If you poke a toothpick near the middle, it should come out with a few moist crumbs attached.
Well, this is the hardest part—let the bars cool completely in the pan on a wire rack. Once they're cool, use that parchment overhang to lift them out gently.
Cut them into squares and serve. Enjoy every single bite!
Notes & Tips
-
1
Don't rush the cooling process or the bars might break
-
2
Parchment paper is essential for a clean release
-
3
Ensure butter is truly softened for the best creamed texture

Tools You'll Need
-
9x13 inch baking pan for a perfect rectangle
-
Parchment paper to prevent sticking
-
Large and medium mixing bowls for organizing wet and dry items
-
Electric mixer (handheld or stand) for fluffing the butter
-
Measuring cups and spoons for accuracy
-
Spatula for spreading the dough
-
Wire rack to help them cool evenly
Must-Know Tips
-
Slightly underbake, This ensures the bars stay extra chewy rather than cakey
-
Cream butter and sugars well, This creates those little air pockets that make the texture just right
-
Check for moist crumbs, A toothpick with a few moist crumbs means they are perfectly done
Professional Secrets
-
Control the mix, mixing on low speed prevents gluten development for a softer bite
-
Temperature balance, using softened butter rather than melted ensures better structure
-
Sifting effects, whisking dry ingredients separately ensures the baking soda is perfectly distributed

Get Delicious Recipes Weekly
Join 25,000+ home cooks getting our best recipes straight to their inbox.
Free forever • No spam • Unsubscribe anytime