
The original Dairy Queen ice‑cream cake dates back to the mid‑1990s, when the chain introduced a dessert that combined soft‑serve vanilla with a chocolate glaze and a crunchy cookie crust. It quickly became a party staple across America. While the commercial product is convenient, recreating it at home lets you control the sweetness, the texture, and even add a personal twist, like a hint of coffee or a splash of almond milk. This version respects the classic while letting you make it your own.
Why You'll Love It
-
- No fancy equipment needed, just a freezer and a loaf pan
-
- You can customize flavors and add personal touches
-
- The cake stays moist and buttery for days
-
- Perfect for celebrations, no-bake style
"The texture was exactly like the store version—smooth, creamy, and just sweet enough. My kids couldn't believe it was homemade!"
Essential Ingredient Guide
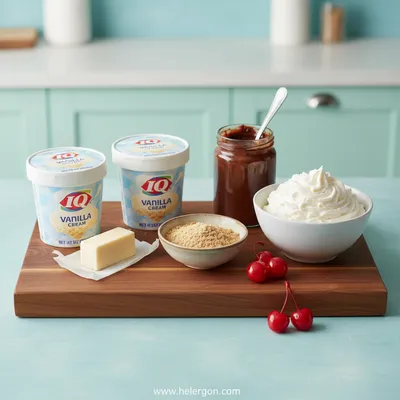
- Vanilla soft‑serve base: Choose a high‑quality vanilla ice cream; it provides the creamy backbone and subtle aroma.
- Chocolate glaze: Melt dark chocolate with a splash of cream for a glossy finish that hardens slightly.
- Cookie crust: Crushed chocolate wafers or graham crackers add a buttery crunch that contrasts the soft interior.
- Butter: Melted butter binds the crust; use unsalted for flavor control.
- Sugar: A pinch balances the bitterness of chocolate and enhances the overall sweetness.
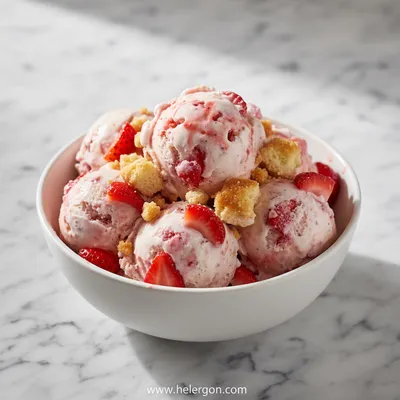
- Optional fruit swirl: A drizzle of raspberry or strawberry puree adds a fresh, tangy lift.
Complete Cooking Process
-
Ingredient Readiness:
Let the ice cream soften for 5 minutes, crush cookies finely, and melt chocolate slowly to avoid scorching.
-
Flavor Development:
Stir vanilla extract into the softened ice cream; the scent deepens as it sits.
-
Texture Control:
Press the crumb mixture firmly into the pan, then layer the ice cream, allowing it to firm up in the freezer.
-
Finishing Touches:
Spread the chocolate glaze while the cake is still slightly soft; it will set into a silky shell.
-
Serving Timing:
Allow the cake to sit at room temperature for 5 minutes before slicing to avoid cracks.
-
Line the pan with parchment paper for easy removal
-
Use a kitchen torch to give the glaze a glossy shine
-
Store the cake covered for up to 3 days; flavors meld beautifully
Pro Tips
I find that a brief pause before the first slice lets the flavors settle, and the cake feels more cohesive. It’s a small moment of anticipation, and then the first bite—soft, buttery, with that familiar chocolate snap—makes it all worth it. So, take your time, enjoy the process, and let the kitchen fill with that comforting scent.

The essence of the dish:
A balance of creamy vanilla ice cream, a buttery crumb base, and a glossy chocolate glaze, each layer offering a distinct yet harmonious texture.
A fun fact or historical angle:
When Dairy Queen first launched its ice‑cream cake, it quickly became a go‑to for birthday parties across the Midwest, a tradition that still lives on today.
Flavor or sensory focus:
Expect a cool, velvety mouthfeel that melts slowly, punctuated by a crisp chocolate shell and the faint aroma of toasted butter.
You Must Know
-
Keep the cake frozen until serving
-
Use a sharp, warm knife for clean slices
-
Allow a short rest for perfect texture
Frequently Asked Questions
→ Can I use dairy‑free ice cream?
Yes, substitute a coconut‑based or almond milk ice cream; the texture remains creamy, just add a touch more sugar if needed.
→ How long can I store the cake?
Keep it covered in the freezer for up to 3 days; the glaze may soften slightly but still tastes great.
→ Do I need a springform pan?
A regular loaf pan works fine; just line it with parchment for easy removal.
→ Can I add a fruit layer?
Absolutely—spread a thin layer of raspberry puree before the ice cream for a subtle tart contrast.
→ What's the best chocolate for the glaze?
Use high‑quality dark chocolate (70% cocoa) with a splash of heavy cream for shine and snap.
→ How do I prevent ice crystals?
Soften the ice cream just enough to stir, then fold gently; avoid stirring too vigorously.
Nutrition Facts
per serving
410
Calories
6g
Protein
45g
Carbs
22g
Fat
Taste Profile
Richly sweet with a chocolate snap
Ingredient Substitutions
Don't have an ingredient? Try these alternatives
Use the almond version for a dairy‑free twist; it may be slightly less creamy.
Melt caramel with a splash of cream for a buttery alternative.
Recipe Variations
Try these delicious twists on the original
Spicy Version
Add a pinch of cayenne and a drizzle of chocolate pepper sauce for a subtle kick.
Mediterranean Style
Incorporate toasted almonds and a hint of orange zest into the crust, and finish with a honey‑drizzle.
Common Mistakes to Avoid
Learn from others' mistakes for perfect results
- Over‑mixing the ice cream, causing a grainy texture.
- Using too warm a glaze, which can melt the ice cream.
- Not pressing the crust firmly, leading to crumbs falling out.
Meal Prep & Storage
Make Ahead Tips
You can assemble the crust and ice‑cream layers up to 24 hours ahead; keep covered and frozen, then add the glaze just before serving.
Leftover Ideas
Store leftovers in an airtight container in the freezer; re‑slice with a warm knife for best texture.
Perfect Pairings
Serve this with...
Cooking Timeline
Crush cookies, melt butter, and press crust into pan.
Spread softened ice cream over crust and return to freezer.
Melt chocolate with cream and butter, stirring gently.
Pour glaze over frozen cake, let set briefly.
Final freeze to firm glaze, then slice and serve.
 Sweet Bakes & Desserts
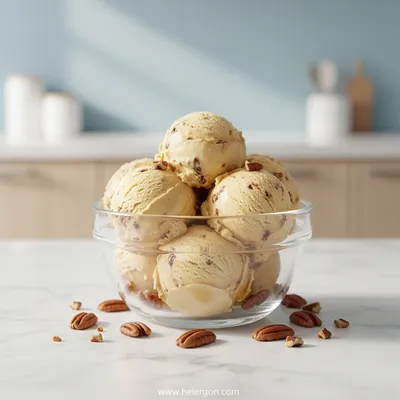
Butter Pecan Ice Cream Recipe
Creamy homemade butter pecan ice cream with crunchy pecans and a buttery finish.
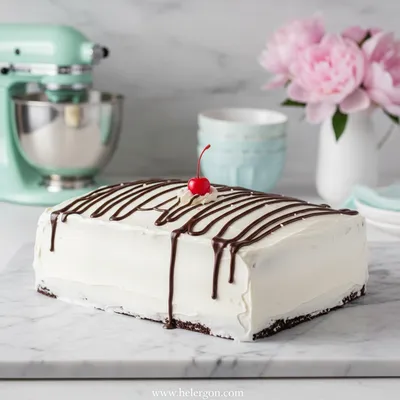
Copycat Dairy Queen Ice Cream Cake
A velvety, layered ice‑cream cake that captures the classic Dairy Queen treat without leaving the house, perfect for birthdays or a simple sweet indulgence.
Timing
Prep Time
15 Minutes
Cook Time
0 Minutes
Total Time
45 Minutes
Recipe Details
Ingredients
Crust
-
01
2 cups chocolate wafer crumbs
-
02
1/4 cup melted butter
-
03
2 tbsp sugar
Ice Cream Layer
-
01
1 quart vanilla soft‑serve ice cream, softened
-
02
1 tsp vanilla extract
Chocolate Glaze
-
01
8 oz dark chocolate, chopped
-
02
1/4 cup heavy cream
-
03
1 tbsp unsalted butter
Instructions
Combine the wafer crumbs, melted butter, and sugar in a bowl; press the mixture firmly into the bottom of a 9‑inch loaf pan.
Let the crust set in the freezer for 10 minutes while you prepare the ice cream.
In a large mixing bowl, fold the softened vanilla ice cream with vanilla extract until smooth, then spread it over the chilled crust, smoothing the top.
Freeze the assembled cake for at least 20 minutes, or until firm.
Meanwhile, melt dark chocolate with heavy cream and butter over low heat, stirring until glossy.
Pour the chocolate glaze over the frozen ice‑cream layer, letting it drip down the sides; return to freezer for another 5 minutes to set.
Remove the cake from the pan, slice with a warm knife, and serve immediately.
Notes & Tips
-
1
If the glaze thickens too much, gently re‑warm it before pouring.
-
2
For a sweeter crust, increase sugar by 1‑2 tbsp.
-
3
You can add a thin layer of crushed caramel candies between the crust and ice cream for extra crunch.
Tools You'll Need
-
Loaf pan (9‑inch)
-
Parchment paper
-
Mixing bowls
-
Spatula
-
Microwave‑safe bowl
-
Sharp knife
Must-Know Tips
-
Don’t over‑mix the ice cream; keep it airy.
-
Let the cake sit for 5 minutes at room temperature before slicing.
-
Use a warm knife for clean cuts.
Professional Secrets
-
Soften ice cream just enough to stir; it stays smoother.
-
Press the crust tightly for a solid base.
-
Glaze while still slightly soft for a perfect shine.

Get Delicious Recipes Weekly
Join 25,000+ home cooks getting our best recipes straight to their inbox.
Free forever • No spam • Unsubscribe anytime