
Ice cream cakes have delighted diners since the mid‑20th century, when frozen desserts first entered the mainstream. The iconic Dairy Queen version became a cultural staple, celebrated for its creamy vanilla layers and chocolate coating. While the commercial version relies on specialized equipment, the core idea—layered cake and ice cream—remains simple enough for home kitchens. This recipe honors that tradition, offering a reliable, small‑batch version that anyone can assemble without a commercial freezer.
Why You'll Love It
-
- No fancy equipment needed, just a freezer.
-
- Layers of vanilla ice cream and soft sponge create contrast.
-
- Chocolate glaze adds a glossy, indulgent finish.
-
- Perfect for any celebration, big or small.
"The cake turned out just like the store‑bought version—only better because I made it with love!"
Essential Ingredient Guide
- Vanilla ice cream: Use a high‑quality vanilla ice cream; it forms the creamy heart of the cake.
- Simple sponge cake: A light, fluffy cake provides texture; homemade or store‑bought both work.
- Chocolate coating: Melted semi‑sweet chocolate adds richness and a glossy finish.
- Butter: Melted butter helps bind the cake crumbs into a sturdy base.
- Sugar: A touch of sugar sweetens the glaze and balances bitterness.
- Whipped cream (optional): For a decorative swirl on top; adds lightness if you like.
Complete Cooking Process
-
Ingredient Readiness:
Soften the ice cream slightly, crumble the cake, and melt the chocolate; this makes assembly smooth.
-
Flavor Development:
The vanilla ice cream slowly melds with the cake crumbs as they sit together in the freezer.
-
Texture Control:
Pressing the crumb mixture firmly creates a stable base; the ice cream stays level.
-
Finishing Touches:
Drizzle the chocolate glaze, let it set, then add any optional toppings.
-
Serving Timing:
Allow the cake to sit at room temperature for 5‑10 minutes before slicing for clean cuts.
-
Use a springform pan for easy release.
-
Line the pan with parchment for extra protection.
-
Freeze the cake at least 4 hours for firmness.
-
Slice with a warm knife for clean edges.
Pro Tips
When you’re ready to serve, take a moment to admire the glossy chocolate surface. The scent of vanilla and cocoa will fill the room, inviting smiles. I often find that letting the cake sit just a little while makes the slices glide like butter, and that small pause feels like a quiet celebration in itself.

The essence of the dish:
A delicate balance of cool, vanilla‑sweet ice cream and tender sponge, wrapped in a glossy chocolate coat—every bite feels like a soft, chilled hug.
A fun fact or historical angle:
The first ice cream cake appeared in the 1960s, when advancements in freezer technology let home cooks experiment with frozen layers. sweet bakes & desserts brought this trend into everyday kitchens.
Flavor or sensory focus:
Expect the creamy, buttery vanilla of the ice cream to melt gently against the warm hint of chocolate, while the sponge provides a subtle, buttery crumb.
You Must Know
-
Keep the ice cream slightly softened for easier spreading.
-
Press the crumb base firmly to avoid wobble.
-
Allow the glaze to set completely before cutting.
Frequently Asked Questions
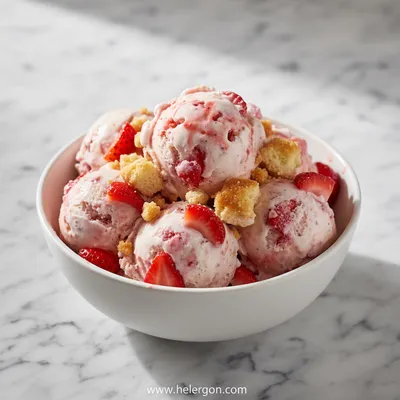
→ Can I use a different ice cream flavor?
Absolutely—strawberry or chocolate works well. For strawberry, try this strawberry ice cream recipe.
→ Do I need a special pan?
A 9‑inch springform pan works best, but any round pan with removable sides will do.
→ How long can I store the cake?
Keep it wrapped in the freezer for up to a week; the texture stays optimal.
→ Can I make a dairy‑free version?
Yes, swap the vanilla ice cream with a coconut‑based almond milk ice cream.
→ What toppings work well?
A sprinkle of crushed nuts, fresh berries, or a drizzle of caramel add extra flair.
→ Do I need to soften the ice cream?
A brief 5‑minute sit on the counter makes it spreadable without melting.
Nutrition Facts
per serving
420
Calories
6g
Protein
45g
Carbs
22g
Fat
Taste Profile
Richly sweet with smooth vanilla undertones
Ingredient Substitutions
Don't have an ingredient? Try these alternatives
Adjust sweetness if using a flavored plant‑based ice cream.
Creates a dairy‑free ganache with a slight coconut note.
Recipe Variations
Try these delicious twists on the original
Spicy Version
Add a pinch of cayenne and drizzle a thin layer of chocolate chili sauce over the ganache.
Mediterranean Style
Mix finely chopped pistachios into the crumb base and sprinkle toasted almond slivers on top.
Common Mistakes to Avoid
Learn from others' mistakes for perfect results
- Over‑mixing the crumb base, making it soggy.
- Letting the ganache set before the ice cream is firm, causing drips.
- Using ice cream that’s too hard to spread, leading to uneven layers.
Meal Prep & Storage
Make Ahead Tips
You can prepare the crumb base and freeze it, then add the ice cream layer the night before; keep the ganache ready to melt just before serving.
Leftover Ideas
Store any leftovers in an airtight container in the freezer; re‑slice with a warm knife when ready to serve again.
Perfect Pairings
Serve this with...
Cooking Timeline
Prepare crumb base, press into pan, and chill.
Soften ice cream, spread over chilled base.
Freeze cake for at least 3 hours.
Melt chocolate and cream, stir into ganache.
Pour ganache, set to harden, then slice.
 Sweet Bakes & Desserts
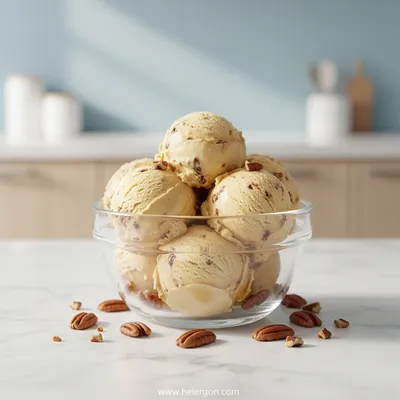
Butter Pecan Ice Cream Recipe
Creamy homemade butter pecan ice cream with crunchy pecans and a buttery finish.
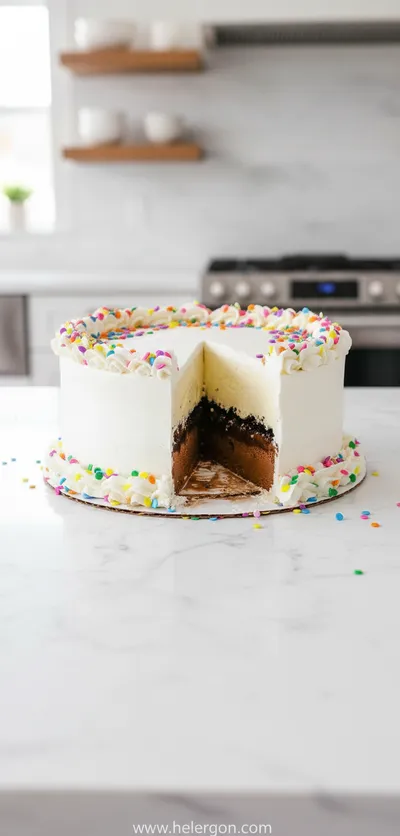
Copycat Dairy Queen Ice Cream Cake Recipe
A homemade, velvety ice cream cake that captures the nostalgic flavor of the classic Dairy Queen treat, perfect for birthdays, celebrations, or a quiet night in.
Timing
Prep Time
20 Minutes
Cook Time
0 Minutes
Total Time
4 Hours 20 Minutes
Recipe Details
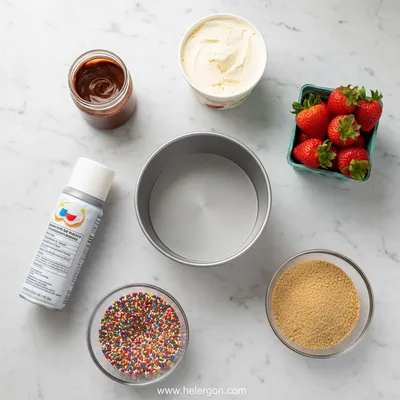
Ingredients
Cake Base
-
01
2 cups cake crumbs (store‑bought or homemade sponge)
-
02
3 tbsp melted butter
-
03
2 tbsp sugar
Ice Cream Layer
-
01
1½ quarts vanilla ice cream (softened)
-
02
1 tsp vanilla extract
Chocolate Ganache
-
01
1 cup semi‑sweet chocolate chips
-
02
½ cup heavy cream
-
03
2 tbsp butter
Instructions
Combine cake crumbs, melted butter, and sugar in a bowl; press the mixture firmly into the bottom of a springform pan to form an even crust.
Let the crust chill in the freezer while you soften the ice cream.
Spread the softened vanilla ice cream over the chilled crust, smoothing with a spatula; return the pan to the freezer for at least 3 hours.
Meanwhile, heat the heavy cream until just simmering, then pour over chocolate chips; stir until smooth, add butter, and let cool slightly.
Pour the chocolate ganache over the frozen ice cream layer, letting it drip down the sides; freeze until the ganache hardens, about 30 minutes, then slice and serve.
Notes & Tips
-
1
If the ice cream becomes too soft while spreading, return it to the freezer for a quick firm‑up.
-
2
For extra flavor, fold in mini chocolate chips into the ice cream before spreading.
-
3
Use a warm knife to cut clean slices; wipe between cuts.
Tools You'll Need
-
Springform pan
-
Mixing bowl
-
Spatula
-
Microwave or double boiler
-
Freezer-safe sheet of parchment
Must-Know Tips
-
Do not over‑mix the crumb base; it should just hold together.
-
Let the ganache set completely before cutting to avoid smearing.
-
Store leftovers in an airtight container to keep texture fresh.
Professional Secrets
-
Use room‑temperature butter for the crumb base – it binds evenly.
-
Heat the cream just until steaming – no boil – for glossy ganache.
-
Press the crumb base firmly but gently to avoid compacting the cake.

Get Delicious Recipes Weekly
Join 25,000+ home cooks getting our best recipes straight to their inbox.
Free forever • No spam • Unsubscribe anytime