
Vanilla, once a luxury of the courts of Spain, traveled across oceans to become a kitchen staple. Its fragrant pods were prized by explorers and merchants, and today they bring a quiet elegance to desserts. This recipe honors that history with a modern, no‑cook twist that lets the pure flavor shine without any heavy processing.
Why You'll Love It
-
- No‑heat method keeps the vanilla flavor bright
-
- Ready in under an hour, perfect for spontaneous cravings
-
- Uses simple pantry staples you likely already have
-
- Creamy texture without the churn of an ice‑cream maker
"The texture was so smooth I could barely tell it was ice cream. Absolutely delightful!"
Essential Ingredient Guide
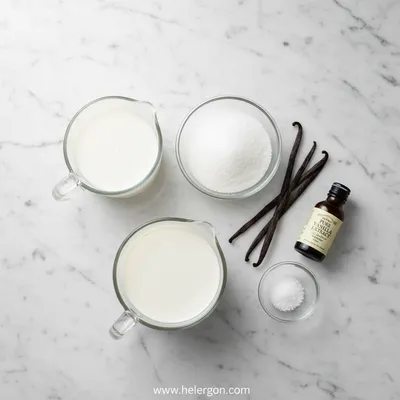
- Whole milk: Choose fresh, preferably high‑fat milk for a richer mouthfeel.
- Heavy cream: Adds silkiness; you can substitute half‑and‑half if you prefer lighter.
- Pure vanilla extract: A good quality extract provides depth; a vanilla bean pod can be split for extra aroma.
- Granulated sugar: Dissolves easily in warm milk; adjust to taste for a subtle sweetness.
- Salt: Just a pinch balances the sweet and brightens the vanilla.
- Optional honey drizzle: Adds a floral note when serving, especially lovely on warm days.
Complete Cooking Process
-
Ingredient Readiness:
Gather all dairy, measure sugar, and have vanilla extract on hand. Warm the milk briefly just to dissolve the sugar.
-
Flavor Development:
Stir in vanilla and salt, letting the aroma bloom as the mixture cools.
-
Texture Control:
Whisk in the cream to create a uniform mixture before chilling.
-
Finishing Touches:
Pour into a shallow dish, cover, and freeze, stirring gently every 20‑30 minutes for a smoother texture.
-
Serving Timing:
Let the ice cream sit at room temperature for a few minutes before scooping for the perfect bite.
-
Freeze the mixing bowl in advance, it helps the mixture set faster
-
Use a hand‑held frother to break up ice crystals during the first stir
-
Add a splash of vanilla bean seeds for extra specks of flavor
-
Cover tightly to prevent ice crystals from forming on the surface
Pro Tips
Well, after you’ve followed those steps, you’ll notice the creaminess that comes from the frozen‑while‑stirring method. I remember the first time I tried this, the kitchen smelled like a vanilla pod store, and the result was a soft, cloud‑like scoop that melted gently on the tongue. It’s a little ritual that brings calm to a busy day.

The essence of the dish:
It’s the simple marriage of vanilla’s fragrant warmth with a cool dairy base, creating a soothing, velvety treat that feels both familiar and new.
A fun fact or historical angle:
Did you know vanilla was once called “the black gold” because of its rarity? Paleo vanilla ice cream shows how versatile this spice truly is.
Flavor or sensory focus:
The first spoonful releases a gentle floral scent, then a buttery smoothness that lingers, with a whisper of sweetness that never overwhelms.
You Must Know
-
Keep the mixture at an even temperature while freezing
-
Stir gently to avoid grainy texture
-
Serve slightly softened for the best mouthfeel
Frequently Asked Questions
→ Can I use a plant‑based milk?
Yes, oat or almond milk work well, just add a bit more cream or coconut milk for richness.
→ Do I need an ice‑cream maker?
No, this recipe uses the freezer and occasional stirring to achieve a creamy texture.
→ How long does it take to freeze?
About 45‑60 minutes, stirring every 20 minutes for a smoother result.
→ Can I add mix‑ins like chocolate chips?
Absolutely, fold them in during the final stir before the last freeze.
→ Is this recipe suitable for keto?
Swap sugar for a low‑carb sweetener like erythritol and keep the carb count low.
→ How long can leftovers be stored?
Keep sealed in the freezer for up to two weeks; let soften before serving.
Nutrition Facts
per serving
210
Calories
4g
Protein
20g
Carbs
12g
Fat
Taste Profile
Classic vanilla sweetness with a buttery smoothness
Ingredient Substitutions
Don't have an ingredient? Try these alternatives
Provides similar richness; may add a subtle coconut note.
Use slightly less maple syrup; adds a gentle caramel flavor.
Recipe Variations
Try these delicious twists on the original
Spicy Version
Add a pinch of cinnamon and a dash of cayenne for a warm kick.
Mediterranean Style
Stir in orange zest and a drizzle of honey for a sun‑kissed twist.
Common Mistakes to Avoid
Learn from others' mistakes for perfect results
- Leaving the mixture untouched leads to icy crystals.
- Using low‑fat milk makes the ice cream watery.
- Over‑stirring can cause a grainy texture.
Meal Prep & Storage
Make Ahead Tips
You can mix the base and refrigerate it overnight; freeze just before serving for an even smoother texture.
Leftover Ideas
Re‑scoop into a bowl and let sit at room temperature for a few minutes before serving again.
Perfect Pairings
Serve this with...
Cooking Timeline
Warm milk, dissolve sugar, and combine cream and vanilla.
Cool mixture, then pour into shallow dish and place in freezer.
Stir every 20 minutes to create smooth texture; repeat until set.
 Sweet Bakes & Desserts
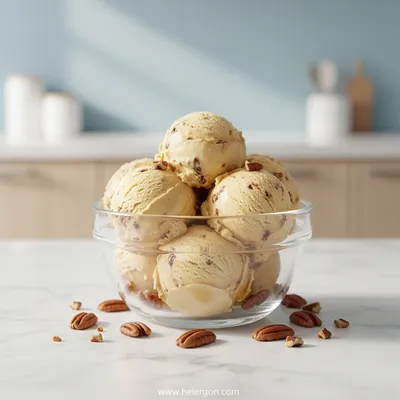
Butter Pecan Ice Cream Recipe
Creamy homemade butter pecan ice cream with crunchy pecans and a buttery finish.
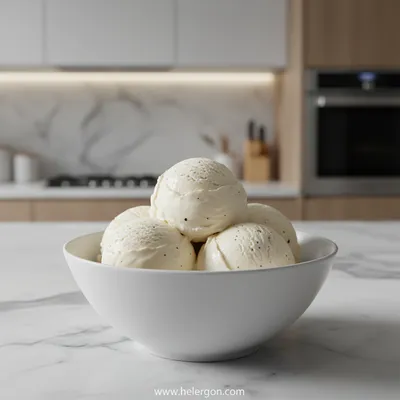
Homemade Vanilla Ice Cream – No‑Cook Recipe
A silky, creamy vanilla ice cream made without ever turning on the stove – quick, simple, and perfect for any season.
Timing
Prep Time
15 Minutes
Cook Time
0 Minutes
Total Time
45 Minutes
Recipe Details
Ingredients
Base
-
01
2 cups whole milk
-
02
1 cup heavy cream
-
03
1/2 cup granulated sugar
-
04
2 teaspoons pure vanilla extract
-
05
1 pinch salt
Optional Topping
-
01
Honey drizzle
-
02
Fresh berries
Instructions
Warm the milk in a saucepan just until steam rises, then whisk in the sugar until it disappears.
Remove from heat, stir in the cream, vanilla extract, and pinch of salt. Let the mixture cool to room temperature.
Pour the cooled mixture into a shallow dish, cover tightly, and place in the freezer.
After 20 minutes, stir vigorously with a fork or hand‑held frother to break any ice crystals. Repeat every 20‑30 minutes until creamy.
When the texture is firm yet scoopable, serve immediately or store sealed for later.
Notes & Tips
-
1
If you prefer a richer flavor, replace half the milk with additional cream.
-
2
For a dairy‑free version, use coconut milk and coconut cream, adjusting sweetness as needed.
-
3
A quick tip: freeze a metal bowl to speed up the setting process.
Tools You'll Need
-
Saucepan
-
Whisk
-
Shallow freezer‑safe dish
-
Fork or hand‑held frother
-
Spatula
Must-Know Tips
-
Don’t over‑stir; gentle folds keep the texture light.
-
Cover the surface with plastic wrap to avoid ice crystals.
-
Taste before the final freeze and adjust sweetness if needed.
Professional Secrets
-
Room‑temperature dairy mixes evenly, preventing graininess.
-
Stirring at intervals creates micro‑crystals for a smoother mouthfeel.
-
Freezing in a metal dish speeds cooling and improves texture.

Get Delicious Recipes Weekly
Join 25,000+ home cooks getting our best recipes straight to their inbox.
Free forever • No spam • Unsubscribe anytime