
Chocolate has traveled across continents, from the ancient cacao fields of Mesoamerica to modern dessert tables. The layered approach reflects how cultures build upon each other's flavors, creating something new yet familiar. This dessert honors that history, pairing the dense, earthy notes of a traditional brownie with the airy, refined mousse that grew popular in French patisseries. The result is a harmonious blend that feels both timeless and contemporary, inviting you to share a piece of culinary heritage without any pretension.
Why You'll Love It
-
- The contrast of fudgy and mousse keeps every bite interesting
-
- Simple ingredients you likely already have
-
- Makes a stunning centerpiece for gatherings
-
- Easy to slice and serve without mess
"These brownies are like a hug in dessert form—so rich yet surprisingly light!"
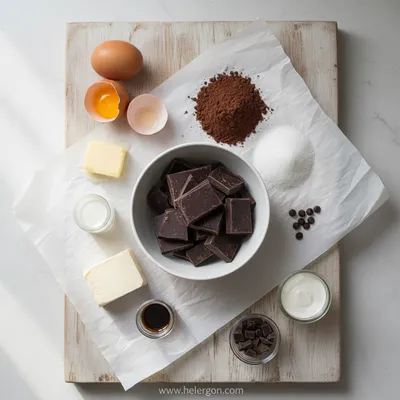
Essential Ingredient Guide
- Dark chocolate: Choose a bar with 60% cocoa for depth; melt slowly to keep the flavor bright
- Heavy cream: Cold cream whips best; it helps the mousse stay airy
- Eggs: Separate yolks and whites; the whites provide lift for the mousse
- Sugar: Granulated works well, but you can substitute coconut sugar for a caramel note
- Lemon juice: A splash balances the richness and accentuates the chocolate
- Vanilla extract: Pure vanilla adds warmth without overwhelming the chocolate
Complete Cooking Process
-
Ingredient Readiness:
Measure and temper chocolate, chill the cream, and separate the eggs before you begin.
-
Flavor Development:
Combine melted chocolate with butter, then fold in the yolk mixture to create a glossy brownie batter.
-
Texture Control:
Whisk egg whites to soft peaks and gently fold them into the mousse, preserving the airy structure.
-
Finishing Touches:
Layer brownie, mousse, and a final dusting of cocoa; chill to set.
-
Serving Timing:
Allow the brownies to sit at room temperature for a few minutes before slicing for clean cuts.
-
Use a silicone spatula for folding to protect the mousse bubbles
-
Chill the pan before adding batter for a more even bake
-
Add a pinch of sea salt on top for contrast
-
Serve with a dollop of whipped cream if desired
Pro Tips
I find that taking a moment to let the brownies rest after removal from the oven lets the flavors settle. It’s a quiet pause, like waiting for the kettle to finish whistling before pouring tea. The texture settles, the layers become distinct, and you can truly appreciate the lightness of the mousse against the dense base. When you finally cut a piece, the knife glides cleanly, revealing the beautiful layers—something that brings a quiet smile to anyone at the table.

The essence of the dish:
A rich, fudgy chocolate brownie forms the foundation, while a silky mousse of whipped cream, chocolate, and a hint of lemon crowns it. The contrast is the heart of this recipe.
A fun fact or historical angle:
Did you know that mousse originated in France in the 18th century as a way to lighten desserts? Pairing it with an American classic like brownies shows how recipes evolve across borders.
Flavor or sensory focus:
Expect the warm, earthy scent of baked chocolate, followed by the cool, airy mouthfeel of mousse that melts gently, leaving a lingering cocoa cocoa richness.
You Must Know
-
Do not over‑mix the brownie batter
-
Fold mousse gently to keep it light
-
Chill long enough for layers to set
Frequently Asked Questions
→ Can I make this gluten‑free?
Yes, simply replace the all‑purpose flour with a gluten‑free blend; the texture remains lovely.
→ How long can I store leftovers?
Refrigerate in an airtight container for up to three days; the mousse stays firm and the brownie stays moist.
→ Can I freeze the brownies?
Absolutely—wrap tightly and freeze for up to two months. Thaw in the fridge before serving.
→ What if I don’t have a mixer?
A sturdy whisk works fine for the mousse; it may take a bit longer, but the result is still airy.
→ Is it possible to add nuts?
Sure, toasted pecans or walnuts add a pleasant crunch when folded into the brownie layer.
→ Can I substitute dark chocolate with milk chocolate?
You can, but the mousse will be sweeter and less intense; consider reducing sugar slightly.
Nutrition Facts
per serving
420
Calories
6g
Protein
38g
Carbs
28g
Fat
Taste Profile
Rich chocolate with a light, airy finish
Ingredient Substitutions
Don't have an ingredient? Try these alternatives
Will be sweeter; reduce sugar slightly
Gives a hint of coconut flavor and keeps it dairy‑free
Recipe Variations
Try these delicious twists on the original
Spicy Version
Add a pinch of cayenne pepper to the mousse for a subtle heat.
Mediterranean Style
Stir in chopped dried cherries and toasted pistachios into the mousse.
Common Mistakes to Avoid
Learn from others' mistakes for perfect results
- Over‑mixing the batter, which makes brownies tough
- Folding mousse too aggressively, losing air
- Skipping the chilling step, resulting in a runny top
Meal Prep & Storage
Make Ahead Tips
You can bake the brownie layer a day ahead and keep it wrapped; prepare the mousse fresh the same day for best texture.
Leftover Ideas
Reheat gently in a microwave for 10‑15 seconds if you prefer a warm brownie with still‑set mousse.
Perfect Pairings
Serve this with...
Cooking Timeline
Gather and measure all ingredients; line pan with parchment
Melt butter and chocolate, then combine with sugar and eggs
Bake brownie layer, then let cool while preparing mousse
Prepare mousse, melt chocolate, combine with yolks, cool, and fold in whipped cream
Layer mousse over brownie, dust with cocoa, and refrigerate to set
 Sweet Bakes & Desserts
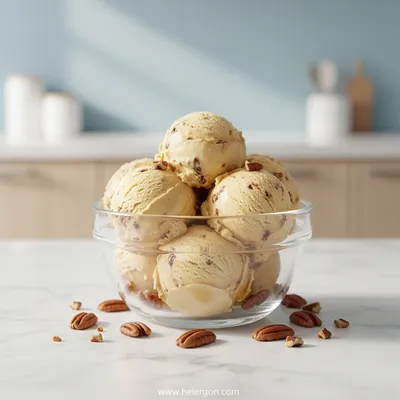
Butter Pecan Ice Cream Recipe
Creamy homemade butter pecan ice cream with crunchy pecans and a buttery finish.
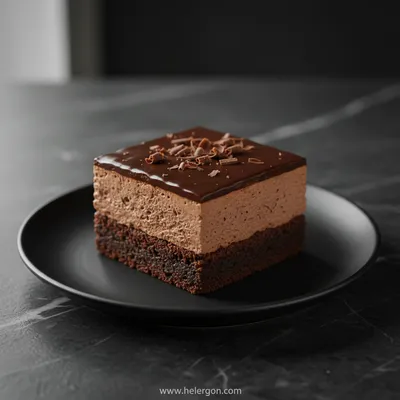
Layered Chocolate Mousse Brownies
Indulge in a velvety marriage of fudgy brownie base and airy chocolate mousse, layered to create a dessert that feels both comforting and luxurious.
Timing
Prep Time
20 Minutes
Cook Time
25 Minutes
Total Time
45 Minutes
Recipe Details
Ingredients
Brownie Base
-
01
1/2 cup unsalted butter, melted
-
02
8 oz dark chocolate, chopped
-
03
3/4 cup granulated sugar
-
04
2 large eggs
-
05
1 tsp vanilla extract
-
06
1/3 cup all‑purpose flour
-
07
1/4 tsp salt
Chocolate Mousse
-
01
1 cup heavy cream, cold
-
02
4 oz dark chocolate, melted
-
03
2 large egg yolks
-
04
2 tbsp sugar
-
05
1 tsp lemon juice
-
06
Pinch of sea salt
Finishing
-
01
Cocoa powder for dusting
-
02
Optional whipped cream
Instructions
Preheat the oven to 350°F (175°C) and line an 8‑inch square pan with parchment.
In a heat‑proof bowl, melt butter and dark chocolate together over simmering water, stirring until smooth; set aside to cool slightly.
Whisk sugar into the melted chocolate, then add eggs one at a time, mixing gently. Stir in vanilla, then fold in flour and salt until just combined.
Pour the batter into the prepared pan, spreading evenly. Bake for 18‑20 minutes, until the top is set but the center still looks slightly fudgy.
While the brownies bake, prepare the mousse: In a saucepan, combine melted chocolate, egg yolks, sugar, and lemon juice; whisk over low heat until thickened, then remove and let cool.
In a chilled bowl, whip the cold heavy cream to soft peaks; gently fold the whipped cream into the cooled chocolate mixture.
Once brownies are baked, let them cool in the pan for 10 minutes, then spread the chocolate mousse over the warm brownies, smoothing the surface.
Dust the top with cocoa powder and refrigerate for at least 2 hours to set the mousse.
When ready to serve, lift the brownies out using the parchment, cut into squares, and optionally add a dollop of whipped cream.
Notes & Tips
-
1
Allow the mousse to reach room temperature before folding; it prevents deflation.
-
2
If the brownie layer seems too dense, reduce the flour by a tablespoon.
-
3
For a decorative touch, drizzle melted chocolate over the top before chilling.
Tools You'll Need
-
8‑inch square baking pan
-
Heat‑proof bowl
-
Whisk
-
Spatula
-
Electric mixer or hand whisk
-
Parchment paper
Must-Know Tips
-
Don't over‑mix the brownie batter, it can make the texture tough.
-
Fold the mousse gently to keep it light and airy.
-
Taste the mousse before folding; adjust sweetness if needed.
Professional Secrets
-
Temper the chocolate with butter for a glossy finish.
-
Whip cream cold for maximum volume.
-
Allow the brownies to rest before adding mousse for better layer adhesion.

Get Delicious Recipes Weekly
Join 25,000+ home cooks getting our best recipes straight to their inbox.
Free forever • No spam • Unsubscribe anytime