
Energy balls trace their roots to ancient Mediterranean travelers who combined nuts, dried fruit, and honey into compact, portable nutrition. Over time, modern versions have swapped dates for oats and added protein powders for today’s active lifestyles. This evolution makes the snack both nostalgic and contemporary, perfect for a quick refuel after a walk or a midday work break.
Why You'll Love It
-
- No oven required, perfect for any season
-
- Only four simple ingredients, easy to shop
-
- High protein keeps you satisfied longer
-
- Chocolate and peanut butter create a comforting flavor duo
"These balls are my new pantry staple—delicious, nutritious, and ready in minutes!"
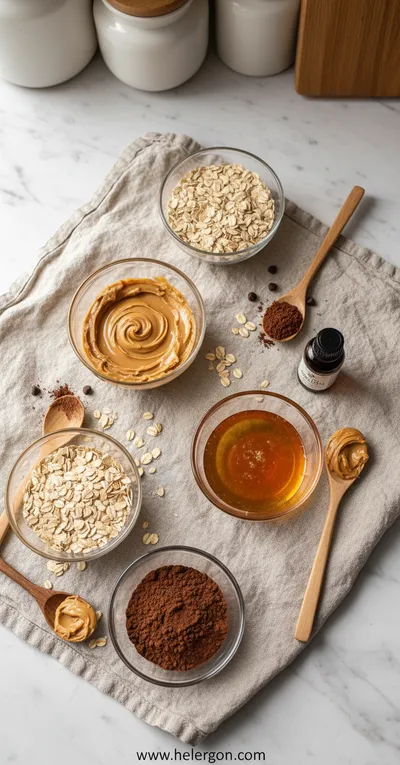
Essential Ingredient Guide
- Peanut butter: Choose a natural, unsweetened variety for authentic flavor and healthy fats.
- Protein powder: A vanilla or chocolate whey works well; it adds structure and a protein punch.
- Cocoa powder: Unsweetened cocoa brings deep chocolate notes without extra sugar.
- Honey: A touch of honey binds everything together and adds gentle sweetness.
- Salt: A pinch brightens the chocolate and balances the sweetness.
- Optional toppings: A sprinkle of chopped nuts or shredded coconut adds texture if you like.
Complete Cooking Process
-
Ingredient Readiness:
Measure out peanut butter, protein powder, cocoa, and honey. Let the honey run a little warm so it mixes easily.
-
Flavor Development:
Combine all ingredients in a bowl; the cocoa releases aroma as you stir, and the mixture becomes glossy.
-
Texture Control:
Roll the dough between your palms; the friction creates a firm exterior while keeping the center tender.
-
Finishing Touches:
Optional: roll each ball in extra cocoa or chopped nuts for a decorative finish.
-
Serving Timing:
Let the balls set in the fridge for at least 20 minutes before serving for best texture.
-
If the mixture feels too sticky, add a tablespoon of oats.
-
Chill the dough for 10 minutes if it's hard to roll.
-
Store in an airtight container to keep moisture out.
-
Press a small dent in the top and drizzle extra honey for a glossy finish.
Pro Tips
Well, these little adjustments can mean the difference between a crumbly ball and a perfect, bite‑size treat. I like to line the container with parchment; it makes removal effortless, and the balls keep their shape beautifully. You’ll notice the subtle shift in texture when the chilled dough meets room temperature, a gentle reminder that patience is part of the pleasure.
 Easy Weeknight Dinners
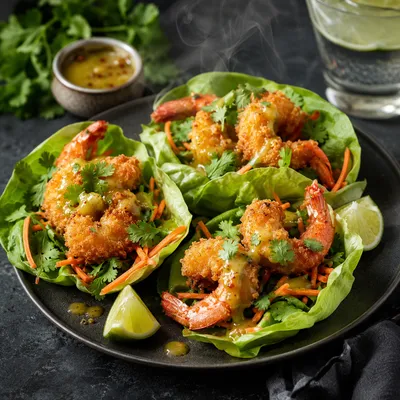
Thai Shrimp Wraps – Flavor-Packed Easy Dinner
Crispy, aromatic shrimp wrapped in lettuce, perfect for a quick, flavorful dinner.
The essence of the dish:
The magic lies in the balance of creamy peanut butter, deep cocoa, and a protein boost that creates a tender, yet sturdy bite—soft inside, with a faint cocoa crust.
A fun fact or historical angle:
Did you know that early versions of energy balls were used by soldiers in the 19th century as portable nutrition? They mixed nuts and honey for stamina on long marches.
Flavor or sensory focus:
You’ll first notice the sweet, earthy chocolate aroma, followed by the nutty richness of peanut butter, and finish with a subtle honeyed afterglow.
You Must Know
-
Keep the mixture chilled for easy rolling
-
Use natural peanut butter for best texture
-
Don’t over‑mix; stop when glossy
Frequently Asked Questions
→ Can I use almond butter instead of peanut butter?
Yes, almond butter works well and adds a slightly sweeter note. The texture remains similar.
→ How long do the balls stay fresh?
Stored in an airtight container in the refrigerator, they stay fresh for up to a week.
→ Can I make them vegan?
Swap honey for maple syrup and choose a plant‑based protein powder to keep them vegan.
→ Do I need to chill them before rolling?
A brief chill of 10‑15 minutes makes the dough easier to handle, but it’s not mandatory.
→ What protein powder flavor works best?
Chocolate or vanilla whey blends seamlessly; avoid overly flavored powders that might clash.
→ Can I add oats for extra texture?
Absolutely—add up to ¼ cup rolled oats for a chewier bite without altering the flavor balance.
Nutrition Facts
per serving
120
Calories
6g
Protein
12g
Carbs
7g
Fat
Taste Profile
A smooth blend of chocolate richness and nutty sweetness
Ingredient Substitutions
Don't have an ingredient? Try these alternatives
Adds a milder flavor; keep the same quantity.
Use ¼ cup; it adds a light maple note without altering texture.
Recipe Variations
Try these delicious twists on the original
Spicy Version
Add ½ teaspoon cayenne pepper and a pinch of sea salt for a gentle heat contrast.
Mediterranean Style
Incorporate chopped dried figs, pistachios, and a drizzle of tahini for a savory twist.
Common Mistakes to Avoid
Learn from others' mistakes for perfect results
- Over‑mixing creates a dry crumbly texture.
- Skipping the chilling step makes the dough hard to roll.
- Using honey that’s too cold can prevent proper binding.
Meal Prep & Storage
Make Ahead Tips
You can mix and chill the dough up to 24 hours ahead. Roll the balls just before serving for optimal freshness.
Leftover Ideas
Reheat gently in a microwave for 10‑15 seconds if you prefer a softer texture, or enjoy cold straight from the fridge.
Perfect Pairings
Serve this with...
Cooking Timeline
Gather and measure all ingredients; warm honey slightly.
Mix peanut butter, honey, cocoa, protein powder, and salt until glossy.
Chill mixture in the refrigerator to firm up.
Roll chilled mixture into balls and optionally coat with extra cocoa.
Re‑chill balls for final firming before serving.
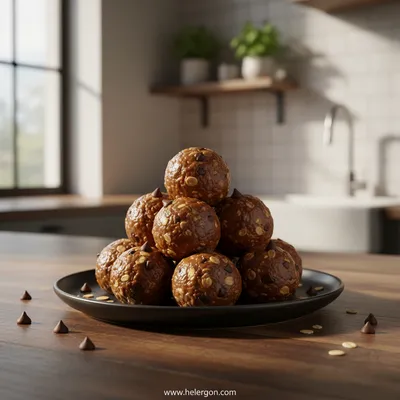
No-Bake Chocolate Peanut Butter Protein Balls
These chewy, chocolate‑kissed peanut butter balls pack protein and flavor in just four ingredients.
Timing
Prep Time
10 Minutes
Cook Time
0 Minutes
Total Time
20 Minutes
Recipe Details
Ingredients
Main Ingredients
-
01
1 cup natural peanut butter
-
02
1/2 cup chocolate protein powder
-
03
1/4 cup unsweetened cocoa powder
-
04
1/4 cup honey
-
05
Pinch of salt
Instructions
In a medium bowl, combine the peanut butter and honey; stir until smooth and slightly warmed.
Add the protein powder, cocoa powder, and salt. Mix gently until the dough becomes glossy and holds together.
Cover the bowl and chill for 10‑15 minutes to firm up the mixture.
Using your hands, roll the chilled dough into 1‑inch balls. If desired, roll each ball in extra cocoa powder or chopped nuts.
Place the balls on a parchment‑lined tray and refrigerate for another 15 minutes before serving.
Notes & Tips
-
1
If the mixture sticks to your hands, lightly dampen them with water.
-
2
For a richer chocolate flavor, use a spoonful of melted dark chocolate mixed in with the cocoa.
-
3
You can double the batch and freeze the balls for up to 2 months.

Tools You'll Need
-
Mixing bowl
-
Spatula
-
Measuring cups and spoons
-
Parchment paper
-
Refrigerator
Must-Know Tips
-
Don’t over‑mix; stop when the dough looks glossy.
-
Chill the mixture for easier rolling.
-
Store in a tightly sealed container to prevent drying out.
Professional Secrets
-
Room‑temperature peanut butter emulsifies better with honey.
-
All‑dry ingredients sifted together prevent lumps in the final texture.
-
A quick flash chill sets the exterior while keeping the interior soft.

Get Delicious Recipes Weekly
Join 25,000+ home cooks getting our best recipes straight to their inbox.
Free forever • No spam • Unsubscribe anytime