
Ice cream has traveled from ancient Chinese snow‑flavored desserts to the hand‑cranked delights of early 20th‑century America. This no‑cook method draws on the simple technique of freezing a sweetened dairy base without the need for a churner, making the classic treat accessible to any home kitchen.
Why You'll Love It
-
- No appliances needed, just a freezer.
-
- Creamy texture that rivals churned ice cream.
-
- Simple ingredients you already have.
-
- Perfect for warm days or last‑minute guests.
"The texture was so smooth, I could almost hear the silk as I scooped it."
Essential Ingredient Guide
- Heavy cream: Choose a cream with at least 35% fat for richness; let it sit at room temperature for easier mixing.
- Whole milk: Balances the richness of cream while keeping the mixture pourable.
- Granulated sugar: Dissolves fully; you can adjust sweetness to taste.
- Vanilla extract: Adds aromatic warmth; use pure extract for best flavor.
- Lemon juice: A splash brightens the sweet base and helps prevent ice crystals.
- Pinch of salt: Enhances overall flavor and rounds the sweetness.
Complete Cooking Process
-
Ingredient Readiness:
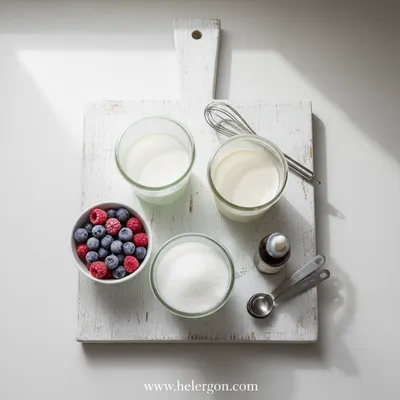
Measure and whisk the cream, milk, sugar, vanilla, lemon juice, and salt together until the sugar dissolves and the mixture is smooth.
-
Flavor Development:
Let the mixture sit for a few minutes so the vanilla fragrance opens up before chilling.
-
Texture Control:
Pour the base into a shallow metal pan, cover, and place in the freezer. Every 30 minutes, stir with a fork to break ice crystals, repeating 3‑4 times.
-
Finishing Touches:
After the final stir, let the ice cream firm for another hour, then scoop into bowls.
-
Serving Timing:
Serve immediately for a soft‑serve feel, or store upright for a firmer texture.
-
Use a metal pan; it freezes faster and aids smoother texture.
-
Stirring at regular intervals prevents large ice crystals.
-
Add a splash of almond milk for extra creaminess without extra fat.
-
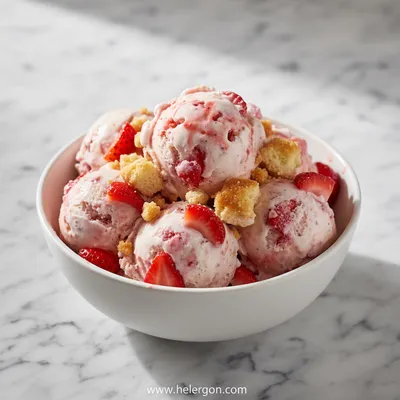
Top with fresh berries for a burst of color and acidity.
Pro Tips
Well, when you follow these little steps, the result feels like a small celebration in a bowl. I often find myself pausing, watching the surface turn glossy, and remembering how simple pleasures can brighten a day. Even if the freezer hum is a bit loud, the quiet satisfaction of a spoonful is worth it.

The essence of the dish:
It’s the silky mouthfeel, the faint vanilla perfume, and the gentle chill that make this ice cream a comforting treat on a hot afternoon.
A fun fact or historical angle:
Before electric freezers, families would mix ice cream on blocks of ice and salt, a labor of love that inspired modern quick‑freeze methods.
Flavor or sensory focus:
Expect a buttery smoothness, a whisper of citrus from the lemon, and a lingering vanilla warmth that hugs the palate.
You Must Know
-
Freeze quickly for a softer texture
-
Stir regularly to avoid graininess
-
Serve within a day for best flavor
Frequently Asked Questions
→ Can I use plant‑based milk?
Yes, substitute the dairy with almond, coconut, or oat milk; just ensure it’s full‑fat for richness.
→ Do I need an ice cream maker?
No, this recipe is designed for a freezer‑only method; just stir as it freezes.
→ How long can it be stored?
Keep it sealed for up to a week; after that texture may become icy.
→ Can I add mix‑ins?
Feel free to fold in chocolate chips, crushed cookies, or fruit after the final stir.
→ Is sugar necessary?
Sugar lowers the freezing point, helping a smoother texture; you can reduce it slightly if desired.
→ What if I don’t have a shallow pan?
A plastic container works; just stir a bit more often to break ice crystals.
Nutrition Facts
per serving
210
Calories
3g
Protein
22g
Carbs
12g
Fat
Taste Profile
Creamy, lightly sweet with a hint of citrus
Ingredient Substitutions
Don't have an ingredient? Try these alternatives
Provides dairy‑free richness; may add a subtle coconut flavor.
Adds depth; reduce by half a tablespoon.
Recipe Variations
Try these delicious twists on the original
Chocolate Swirl
Stir in melted dark chocolate after the final stir for a rich ribbon.
Fruit Burst
Fold in mashed ripe strawberries or mango for a fruity twist.
Common Mistakes to Avoid
Learn from others' mistakes for perfect results
- Skipping the regular stirring, leading to icy texture.
- Using low‑fat dairy, which creates a grainy mouthfeel.
- Leaving the mixture uncovered, causing freezer burn.
Meal Prep & Storage
Make Ahead Tips
You can prepare the base and freeze it up to 24 hours ahead; just give it a quick stir before serving.
Leftover Ideas
Allow leftovers to soften at room temperature for 5 minutes before scooping again.
Perfect Pairings
Serve this with...
Cooking Timeline
Whisk together all base ingredients until smooth.
Place in freezer, stir every 30 minutes to break ice crystals.
Continue stirring at intervals until creamy; let firm for final hour.
Scoop and serve, or store for up to a week.
 Sweet Bakes & Desserts
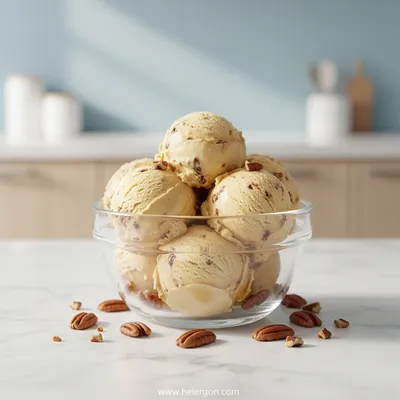
Butter Pecan Ice Cream Recipe
Creamy homemade butter pecan ice cream with crunchy pecans and a buttery finish.
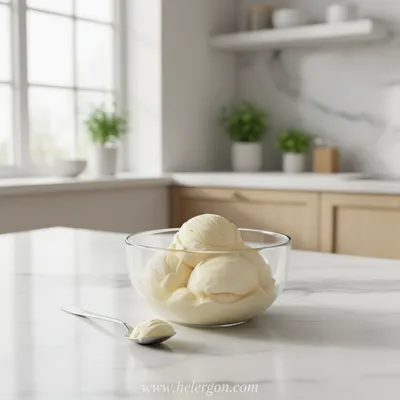
No-Cook Homemade Ice Cream
A quick, no‑cook homemade ice cream that feels as creamy as a summer breeze, ready in minutes with just a handful of pantry staples. Vanilla ice cream lovers will smile at the simple elegance.
Timing
Prep Time
10 Minutes
Cook Time
0 Minutes
Total Time
2 Hours
Recipe Details
Ingredients
Base
-
01
1 cup heavy cream
-
02
1 cup whole milk
-
03
1/3 cup granulated sugar
-
04
2 teaspoons vanilla extract
-
05
1 tablespoon fresh lemon juice
-
06
Pinch of salt
Instructions
In a bowl, whisk together the cream, milk, sugar, vanilla, lemon juice, and salt until the sugar is fully dissolved.
Cover the bowl and place it in the freezer.
After 30 minutes, stir the mixture vigorously with a fork, breaking up any ice crystals.
Repeat the stirring every 30 minutes for about 2 hours, until the texture is smooth and creamy.
Scoop into bowls and enjoy immediately, or store in an airtight container for later.
Notes & Tips
-
1
For extra fluffiness, fold in a tablespoon of whipped cream after the final stir.
-
2
If you prefer a sweeter treat, add an extra tablespoon of honey or maple syrup.
-
3
Serve with fresh berries or a drizzle of caramel for added elegance.
Tools You'll Need
-
Mixing bowl
-
Whisk
-
Fork or spatula
-
Shallow metal pan
-
Freezer-safe cover
Must-Know Tips
-
Don’t skip the regular stirring; it prevents icy texture.
-
Use a metal pan for faster, even freezing.
-
Taste the base before freezing to adjust sweetness.
Professional Secrets
-
Room temperature dairy blends more evenly, reducing graininess.
-
Stirring creates tiny ice crystals, giving that smooth mouthfeel.
-
A pinch of salt amplifies the vanilla aroma.

Get Delicious Recipes Weekly
Join 25,000+ home cooks getting our best recipes straight to their inbox.
Free forever • No spam • Unsubscribe anytime